Recognize Skeleton and Face with Kinect V2 and move "Unity Chan" in Real Time
2017.09.09: created by 


This content corresponds to NtUnity.cs version 1.1 or later.
To Table of Contents
In case of face not moved
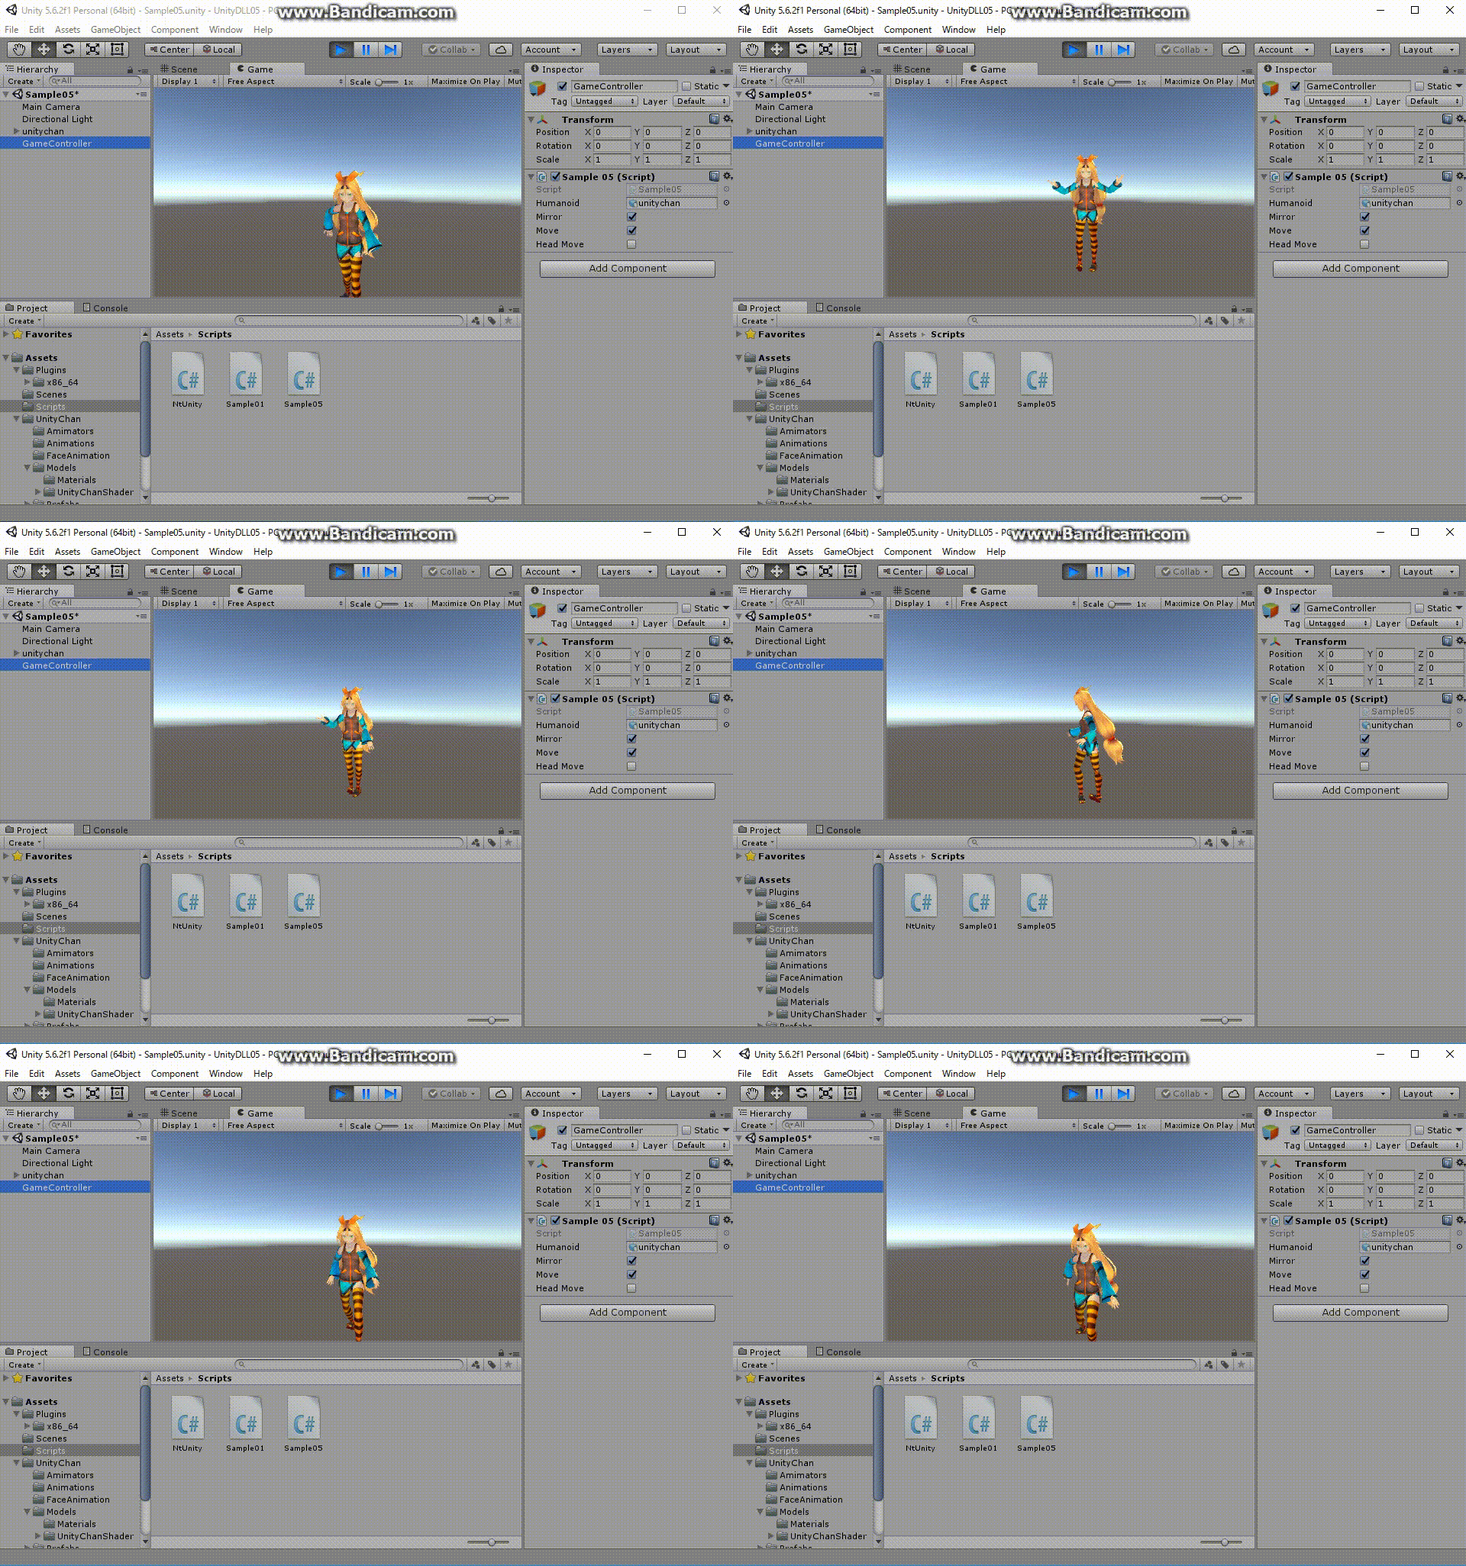
In case of face moved
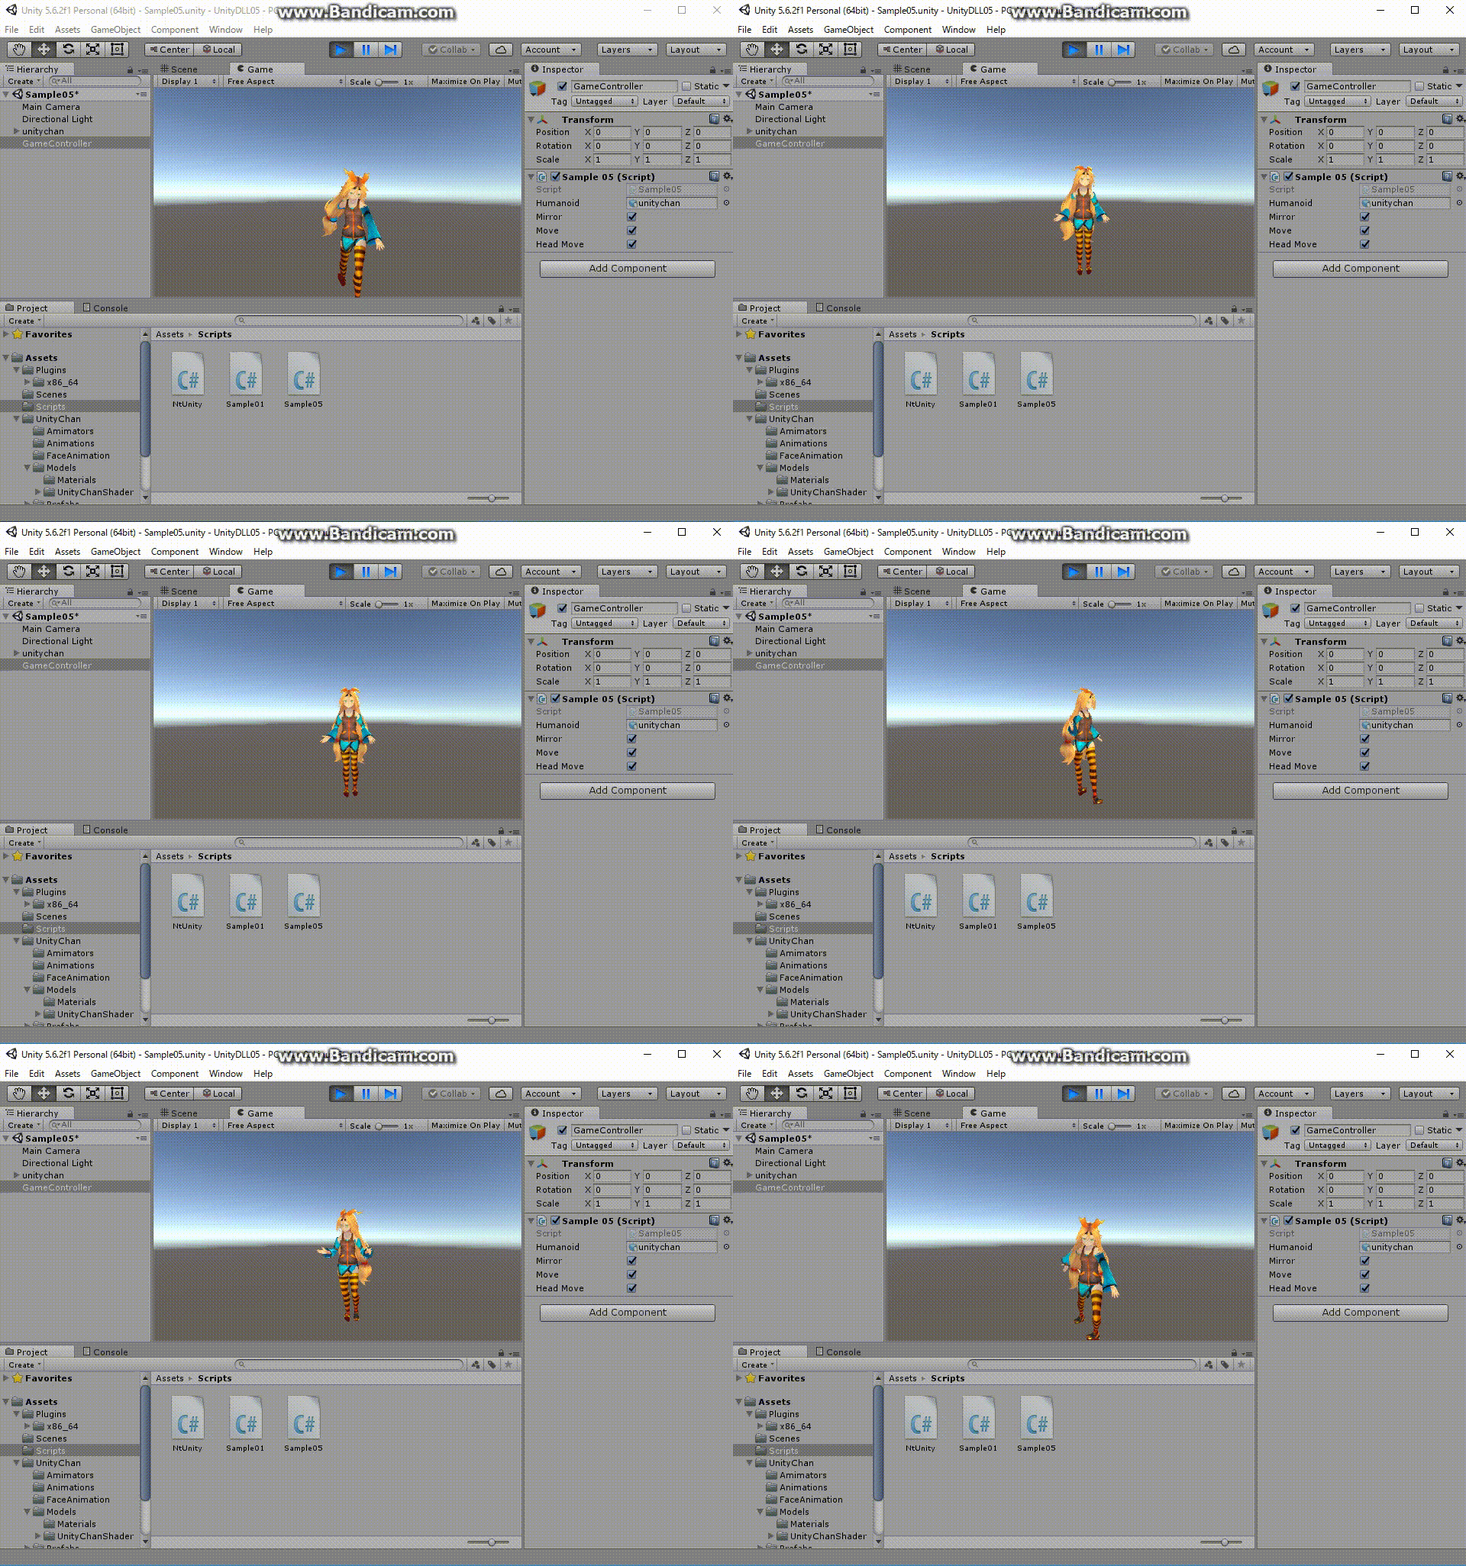
Prerequisite knowledge
Humanoid Character "Unity Chan"
"Unity Chan" package can be downloaded from the official site
http://unity-chan.com/
.
From the above site,
download
UnityChan_1_2.nitypackage
by selecting
"Download" -> "Guideline for using Characters" -> "3D Model Data of Unity Chan".
�
It seems to me that the internal coordinate system of "Unity Chan" 3D model data
(unitychan.fbx) is fairly special.
For each bone's Transform.rotation , rotate
"first at -90 degree around the Z-axis and then 90 degree around the Y-axis"
to reset the coordinate system, then move the original orientation
in the global coordinate system it is necessary to set.
In addition, Transfrom.rotation of the entire model also rotates
"first at -90 degree aruond the Z-axis and then at -90 degree around the Y-axis"
to reset the coordinate system, and then the orientation you want to set.
The model data of "Unity Chan" has a long hair from the head,
so when the direction of the face changes and head moves,
it is very conspicuous.
Recognition of face orientation may fail,
and it moves finaly because of error.
If the head of "Unity Chan" reflects such moves as it is directly,
you may feel very eyesore.
Therefore, in the "Unity Chan" model, it seems more appropriate to
move by using the average (moving average) and so on,
instead of immediately following the change of the recognized face orientation.
Move humanoid model "Unity Chan" in Real Time with Kinect V2
We will use the Unity Project created with
"-
Using various functions of Kinect V2 on Unity (Fundamental Settings)
".
Download UnityDLL01.zip and expand it.
Rename the folder to "UnityDLL05/".
The downloaded zip file does not necessarily contain the latest file.
Please replace the following file with the new version.
Assets/Plugins/x86_64/NtKinectDLL.dll
Assets/Scripts/NtUnity.cs
- Create a new scene and save it as Sample05.unity in the "Assets/Scenes/" folder.
File -> New Scene
File -> Save Scene as ... -> Sample05.unity
- Import the "UnityChan" 3D model data.
When you import "Unity Chan" package, it can be seen as "Assets/UnityChan/".
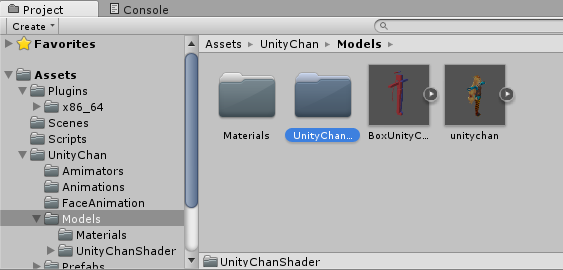
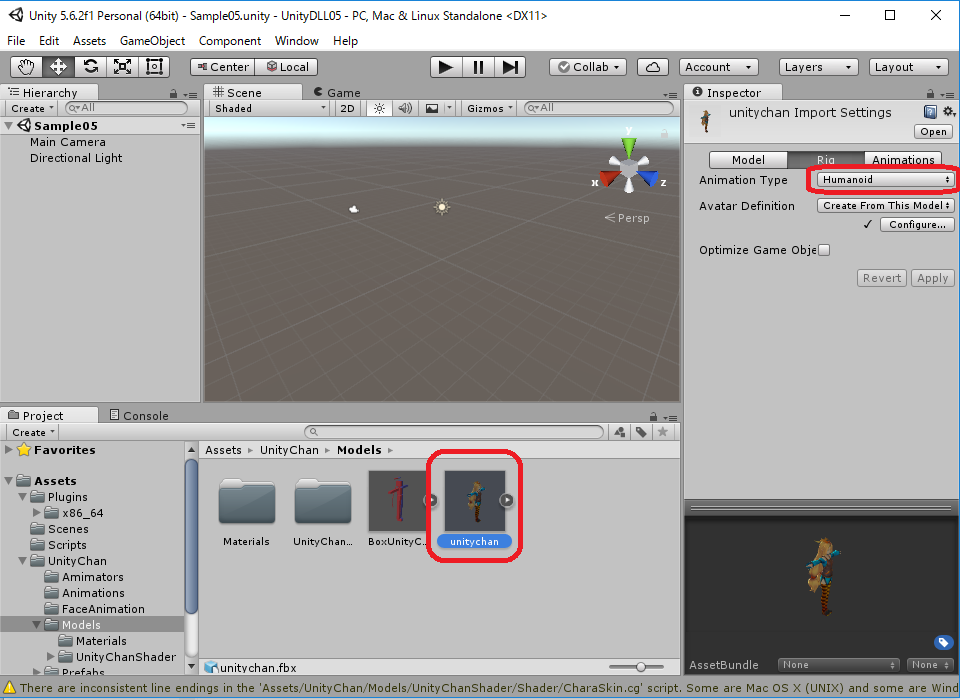
- Click "Assets/UnityChan/Models/unitychan.fbx" in the Projects winddow,
its "Rig" information is displayed in the Inspector window.
Please confirm the Animation Type is "Humanoid".
If it is not "Humanoid", change it to "Humanoid".
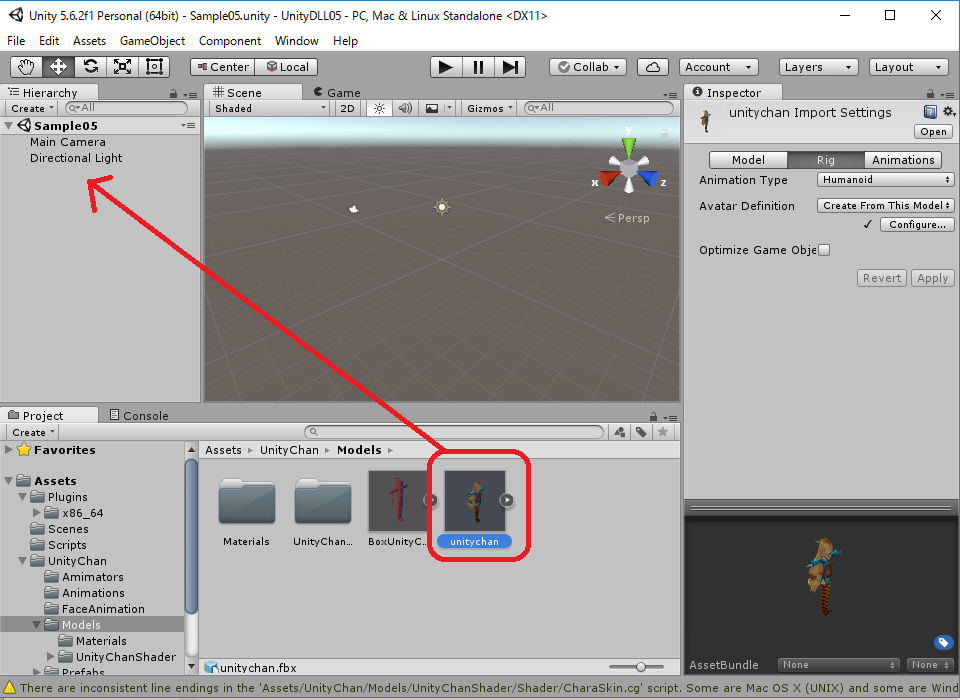
- Drag and place "Unity Chan" model in the Hierarchy window.
Drag "Assets/UnityChan/Models/unitychan.fbx" to the Hierarchy.
With the "unitychan" is selected in the Hierarchy window,
click the "Reset" of Transform's settings in the Inspector window.

- Create new C# script at the "Assets/Scripts/" in the Project window.
Above menu -& "Assets" -> "Create" -> "C# Script" -> Filename is "Sample05".
| Sample05.cs |
using System.Collections;
using System.Collections.Generic;
using UnityEngine;

public class Sample05 : MonoBehaviour {
  public GameObject humanoid;
  public bool mirror = true;
  public bool move = true;
  public bool headMove = true;

  NtUnity.Kinect nt;
  NtUnity.UnityChanSkeleton cs;

  void Start () {
    nt = new NtUnity.Kinect();
    cs = new NtUnity.UnityChanSkeleton(humanoid);
  }

  void Update () {
    nt.setRGB();
    nt.setSkeleton();
    nt.setFace();
    nt.imshowBlack();
    int n = nt.getSkeleton();
    if (n > 0) {
      cs.set(nt,0,mirror,move,headMove);
    }
  }

  void OnApplicationQuit() {
    nt.stopKinect();
  }
}
|
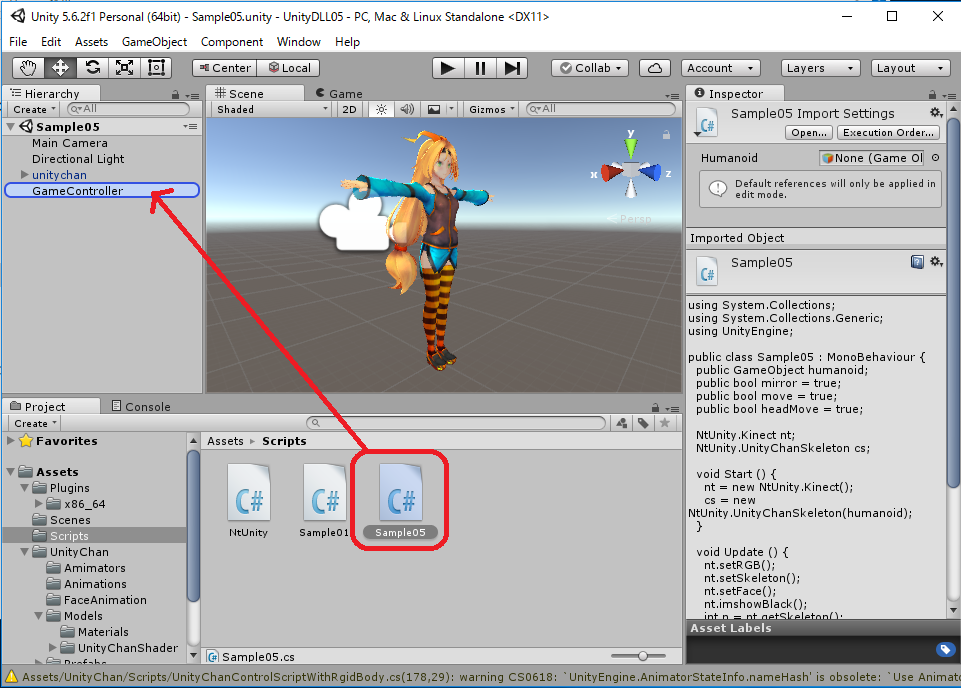
- Place "empty object" in the Hierarchy, and rename it to "GameController".
From the Project window, drag "Sample05.cs" onto the "GameController"
in the Hierarchy and add it as a Component
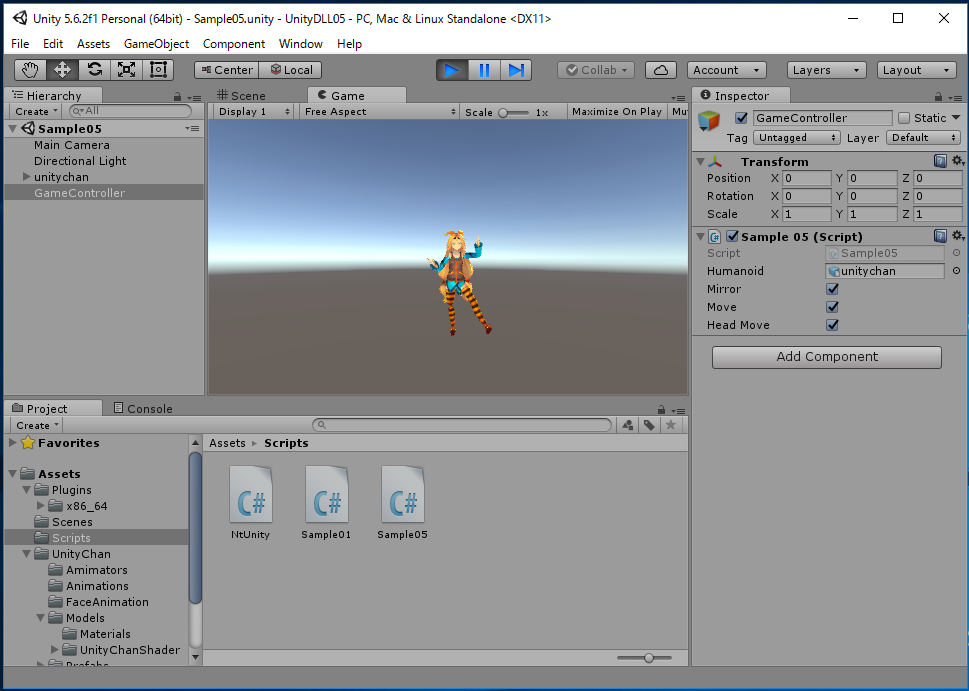
- With "GameController" selected in the Hierarchy window,
"Sample 05 (Scripts)" component are displayed in the Inspector window.
Set the "Humanoid" value to the "unitychan" in the Hierarchywindw to

- Select "Main Camera" in the Hierarchy,
set the Transform's Position (x,y,z)=(0,1,-1).
-
When executed, the recognition status of skeleton and face will be displayed in a separate window.
On the Unity's game window, "Unity Chan" moves follwoing the movement of human beings.
If "mirror" is checked, the mirror image will be displayed in face-to-face format.
Also, if "move" is checked, it follows the change of human position.
if "headMove" is checked, it follows the orientation of face.
[NOTICE]
We generates an OpenCV window in DLL to display the skeleton recognition state.
Note that when the OpenCV window is focused,
that is,
when the Unity game window is not focused,
the screen of Unity will not change.
Click on the top of Unity's window and make it focused,
then try the program's behaviour.
Runtime Video UnityDLL05a.mp4, UnityDLL05b.mp4
- The sample project of Unity is here UnityDLL05.zip.
Since the above zip file may not include the latest "NtKinectDLL.dll" and
"NtUnity.cs",
Download the latest version from here
and replace old one with it.

http://nw.tsuda.ac.jp/


