Sorry, this topics does not correspond to some Humanoid Model ("Ethan" of Starndard Asset, etc). (August/25/ 2017)
At NtUnity version 1.1, "Unity-Chan" 3D Model is supported. Please read this. (2017/09/09)
To Table of Contents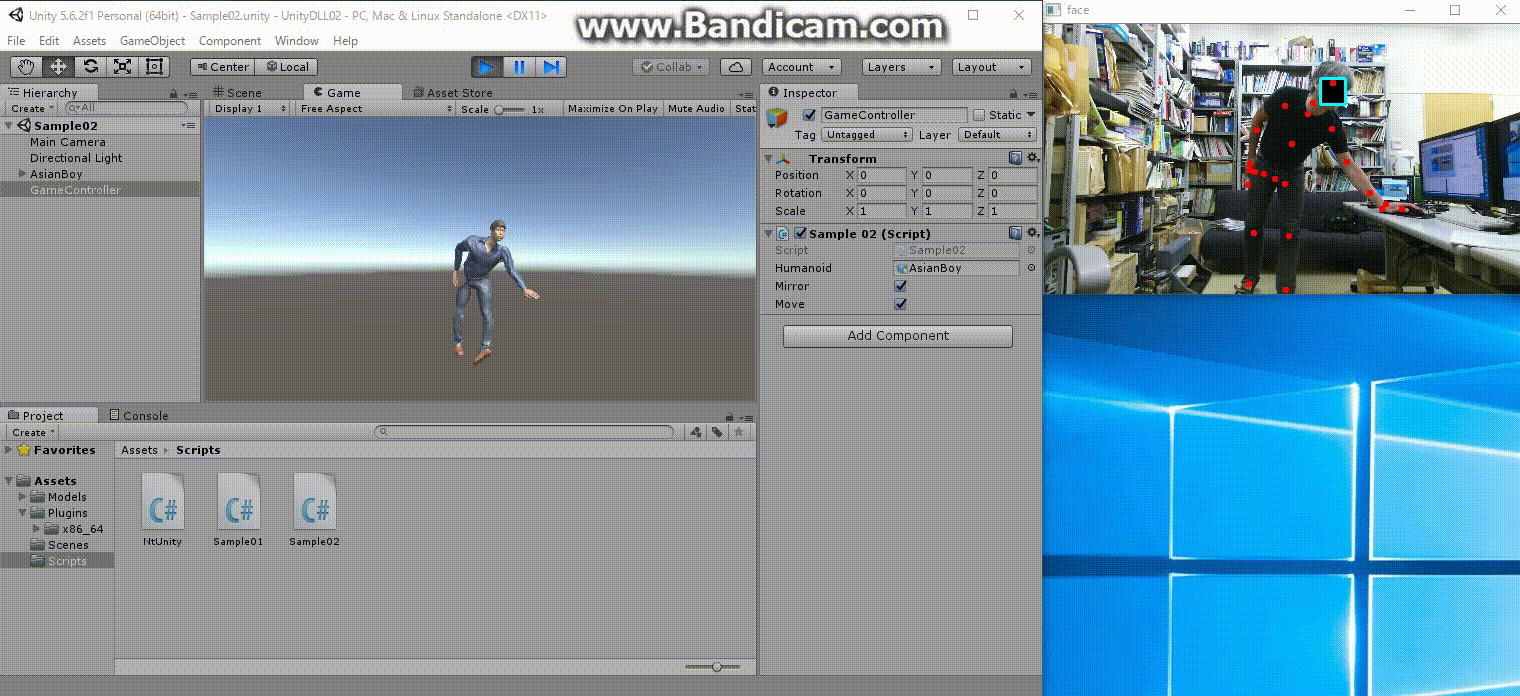
File -> New Scene
File -> Save Scene as ... -> Sample02.unity
Right click in the Assets -> Create -> Folder -> Rename it as "Models"
Here we use makehuman2.zip which is created in " MakeHuman: Create a Humanoid Model to use in Unity ".
When expanding the above zip file, there should be AsianBoy.fbx, AsianGirl.fbx, AfricanBoy.fbx, AfricanGirl.fbx, CaucasianBoy.fbx, CaucasianGirl.fbx, and textures/ under "exports/". Import them under the "Assets/Models/".
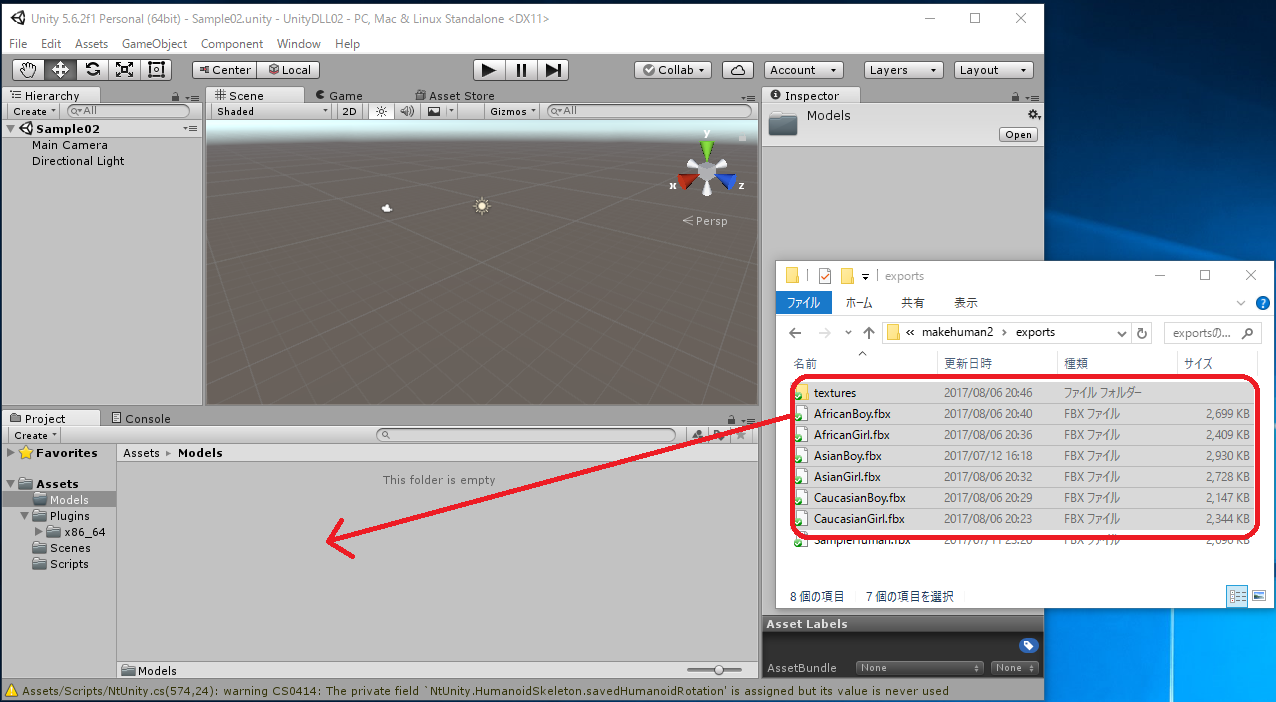
[CAUTION]You can do the above operation through
Assets -> Import New Asset... -> AsianBody.fbx, but in this way, some textures may not be imported and the model became white. If you meet the situation, you must import all the textures in Assets/Models/Materials/ manually.

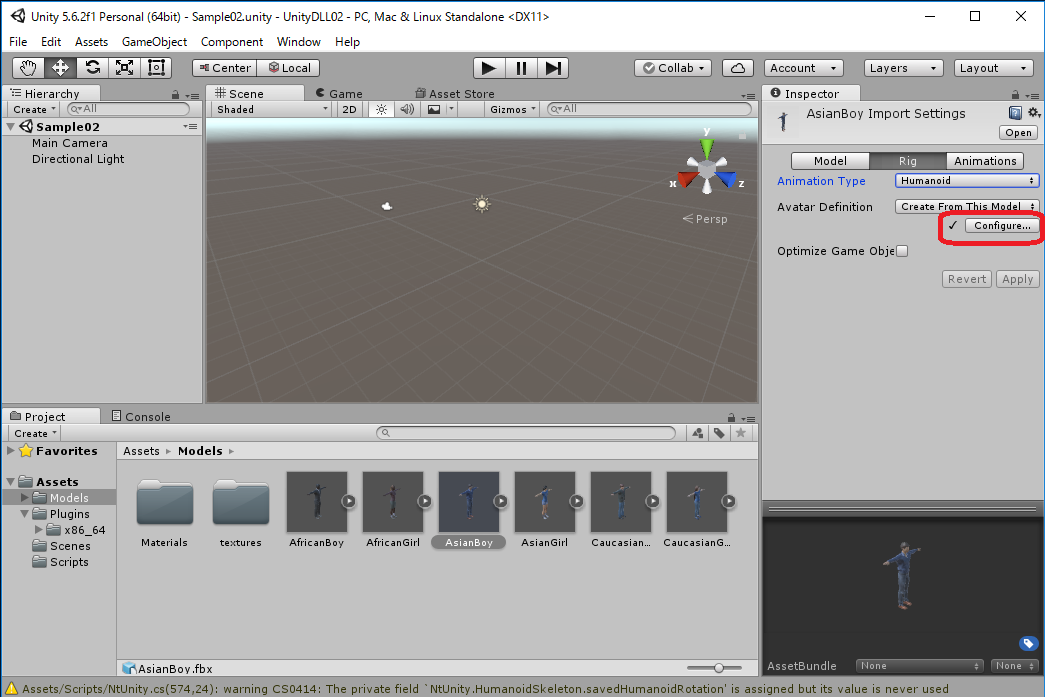
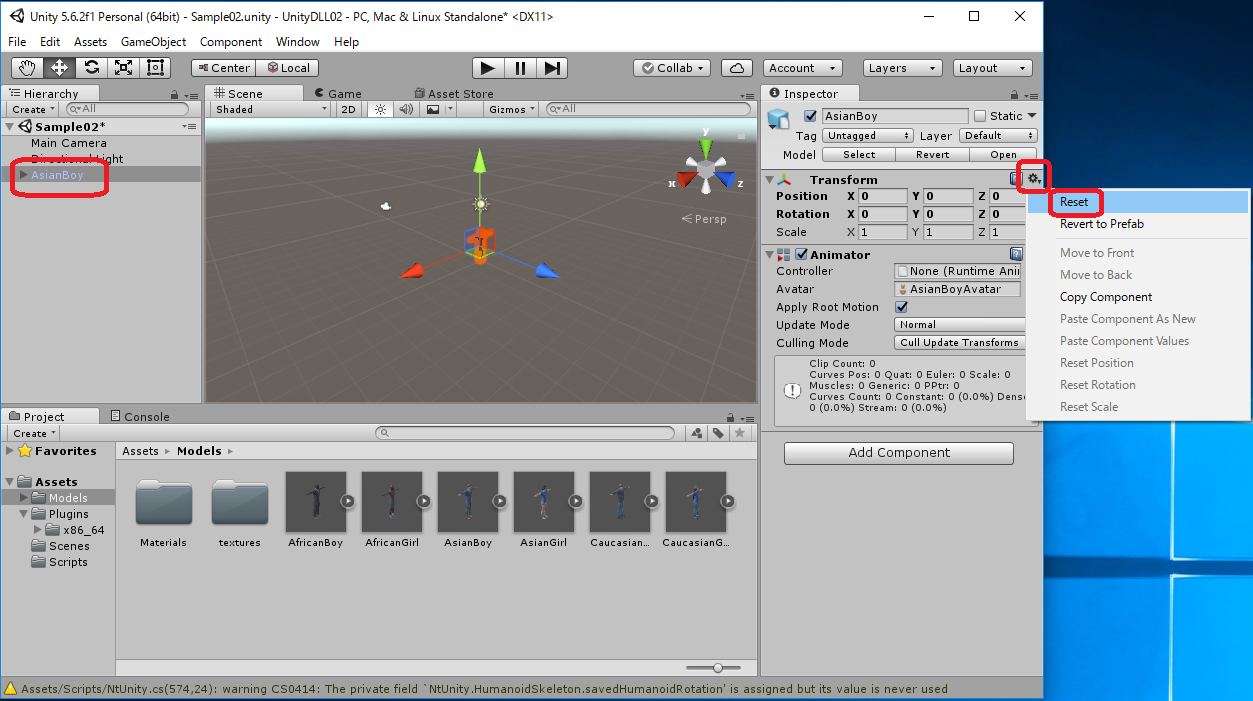
The following figure shows an example of converting "AsianBoy.fbx" to Humanoid. Please convert all 6 fbx to Humanoid.


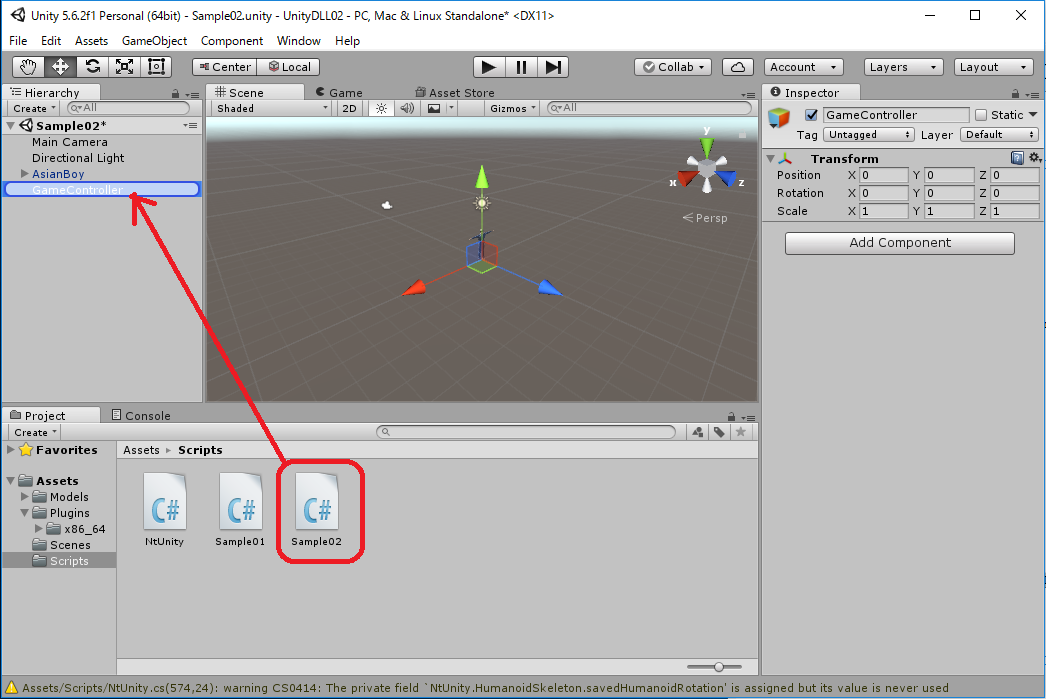
from above menu -> "Assets" -> "Create" -> "C# Script" -> Rename as "Sample02"
| Sample02.cs |
using System.Collections;
using System.Collections.Generic;
using UnityEngine;
public class Sample02 : MonoBehaviour {
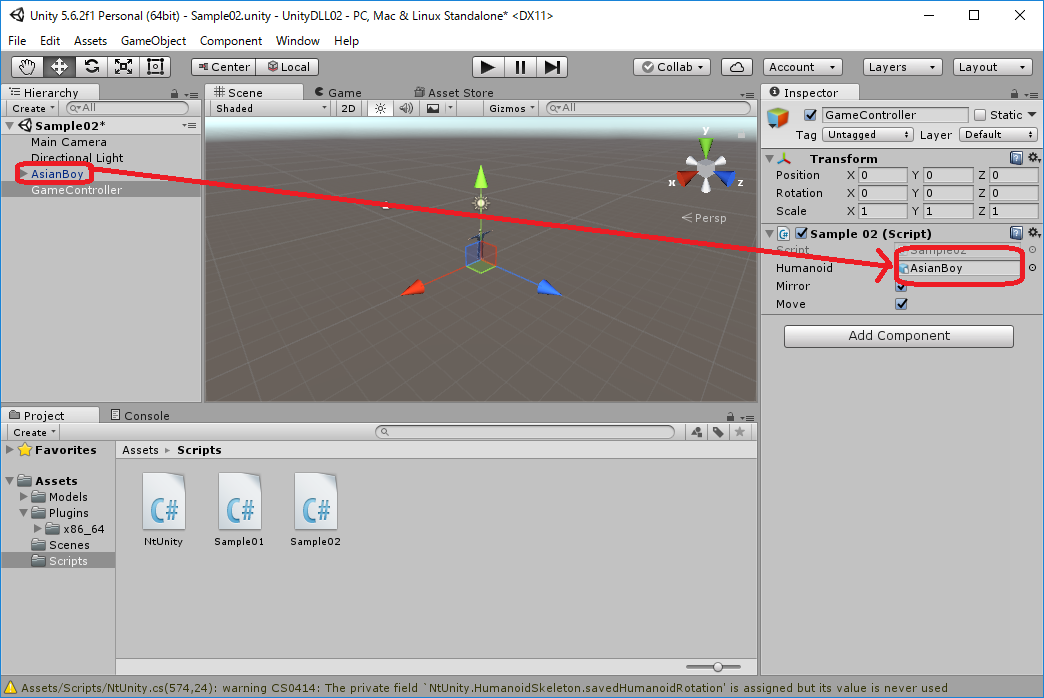
public GameObject humanoid;
public bool mirror = true;
public bool move = true;
NtUnity.Kinect nt;
NtUnity.HumanoidSkeleton hs;
void Start () {
nt = new NtUnity.Kinect();
hs = new NtUnity.HumanoidSkeleton(humanoid);
}
void Update () {
nt.setRGB();
nt.setSkeleton();
nt.setFace();
nt.imshowBlack();
int n = nt.getSkeleton();
if (n > 0) {
hs.set(nt,0,mirror,move);
}
}
void OnApplicationQuit() {
nt.stopKinect();
}
}
|
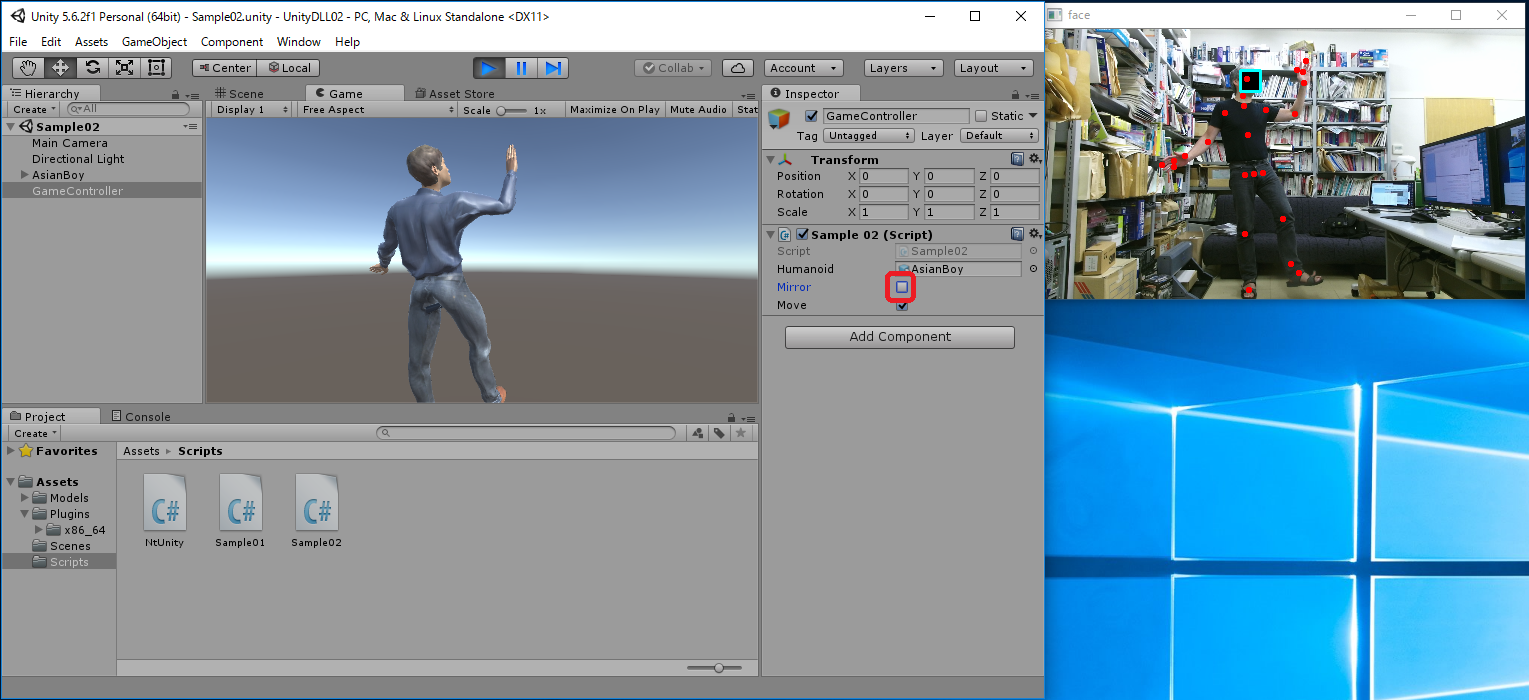
The orientation of human face is reflected in the face direction of Humanoid.
[NOTICE] We generates an OpenCV window in DLL to display the skeleton recognition state. Note that when the OpenCV window is focused, that is, when the Unity game window is not focused, the screen of Unity will not change. Click on the top of Unity's window and make it focused, then try the program's behaviour.
Runtime Video UnityDLL02.mp4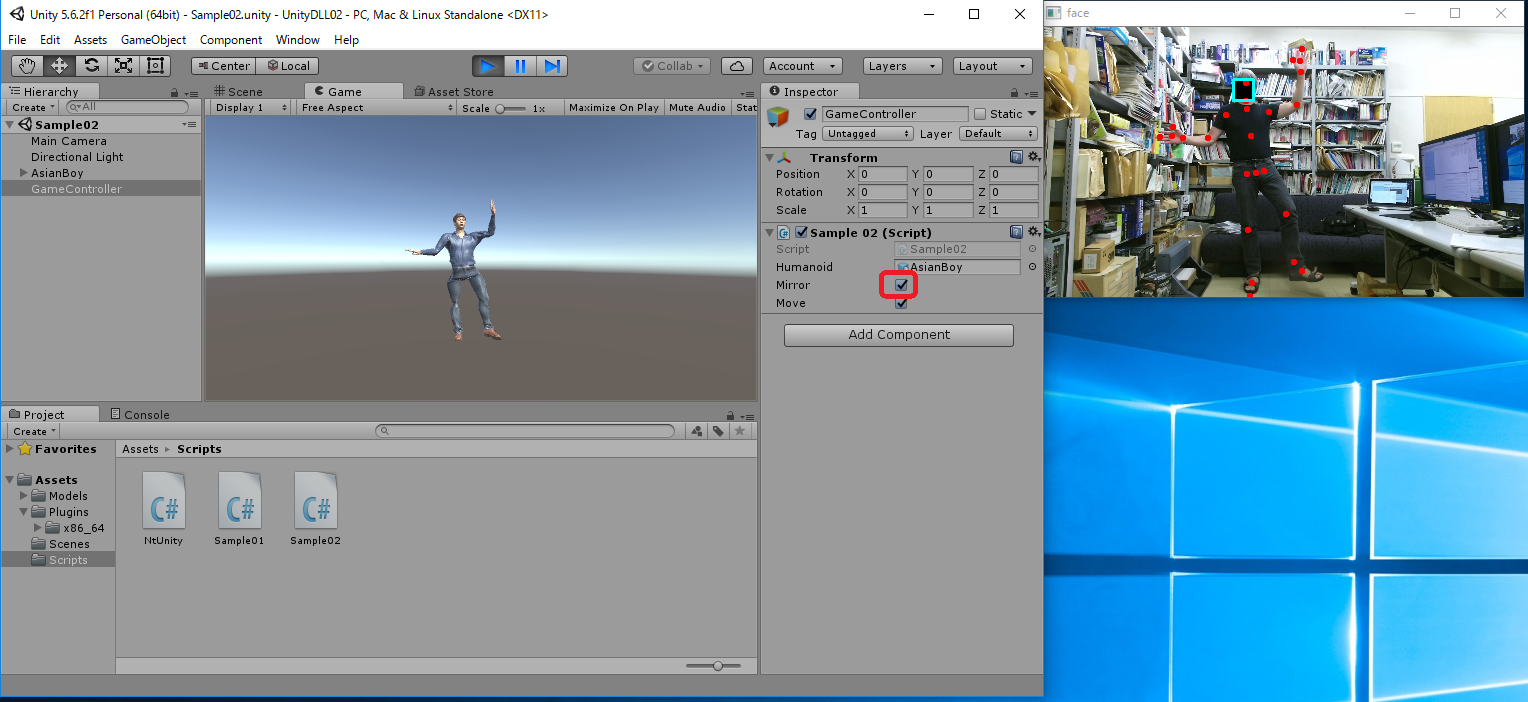
Since the above zip file may not include the latest "NtKinectDLL.dll" and "NtUnity.cs", Download the latest version from here and replace old one with it.
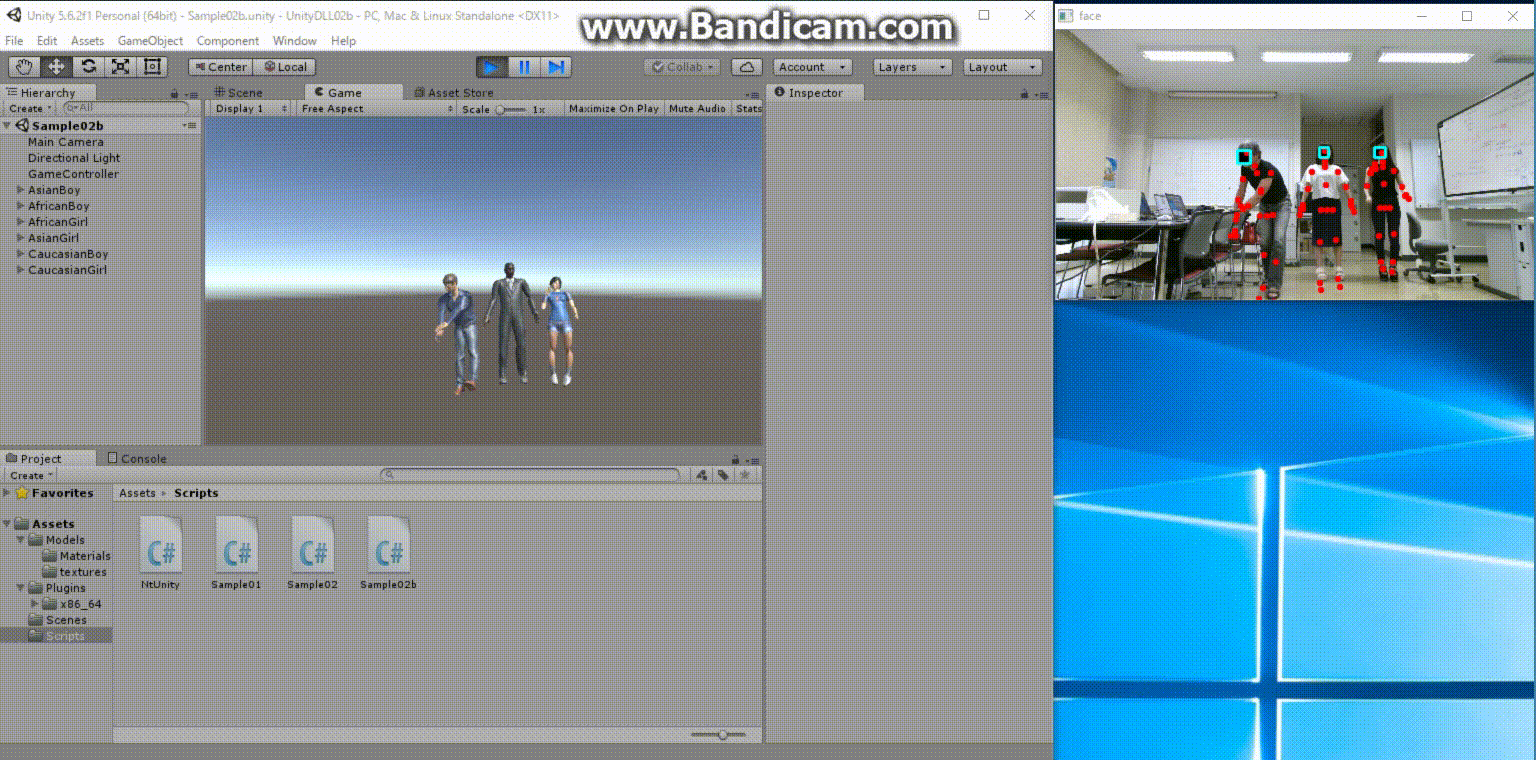
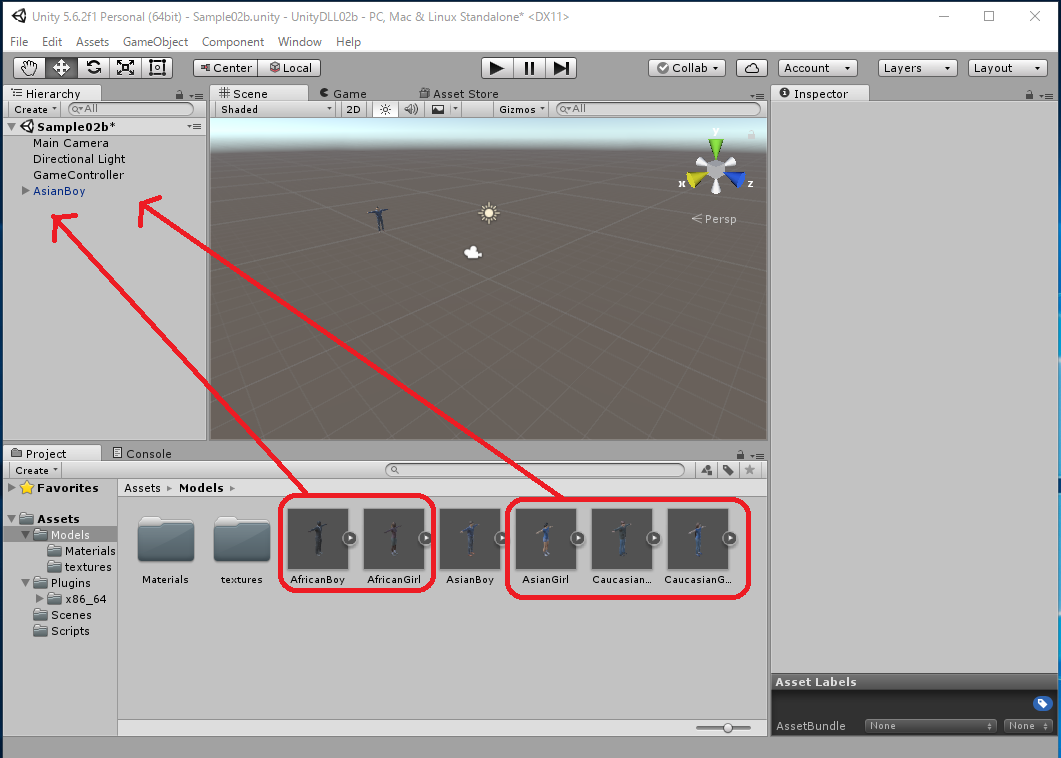
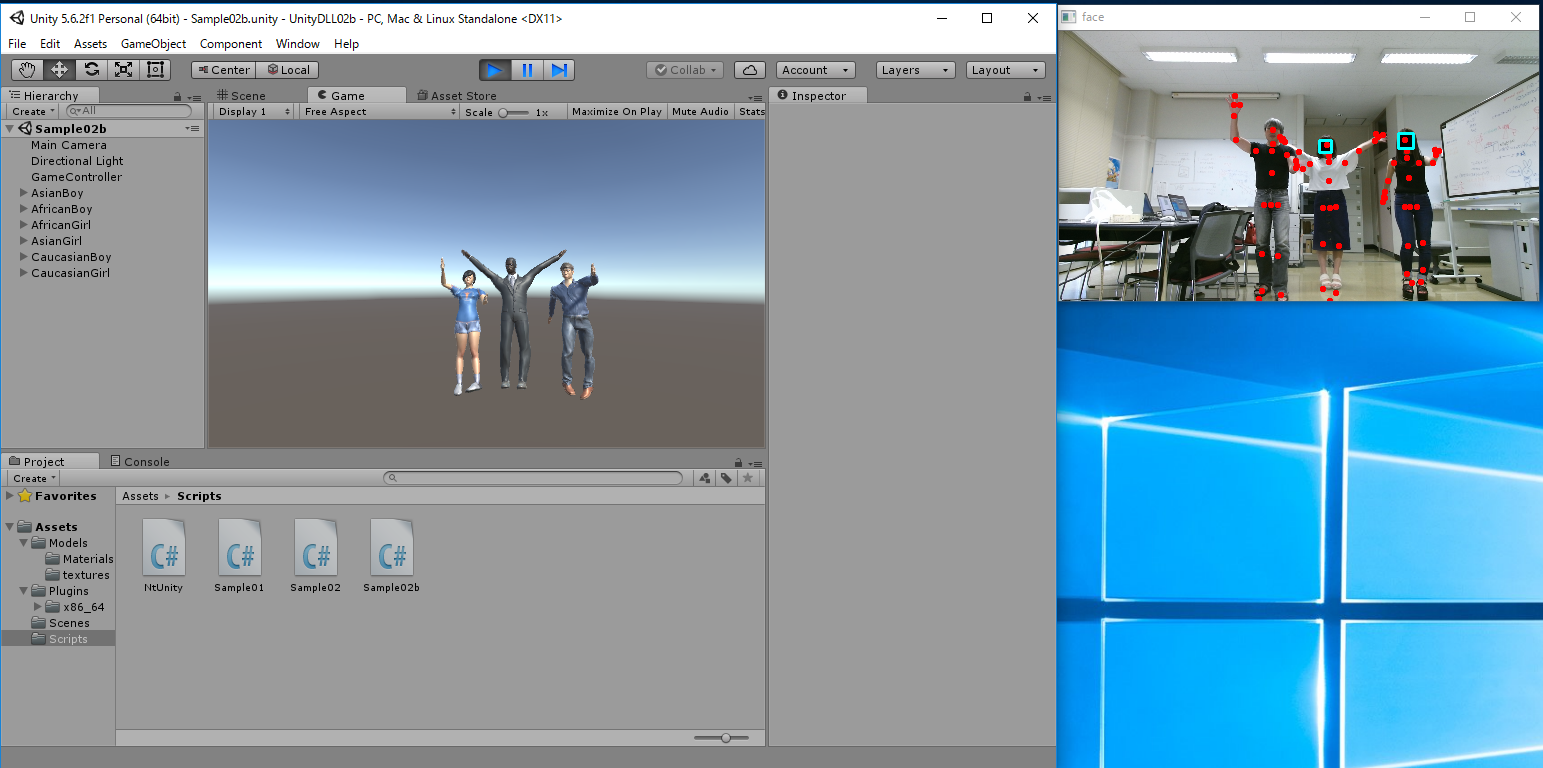
We will create a project to move up to 6 Humanoids simultaneously.
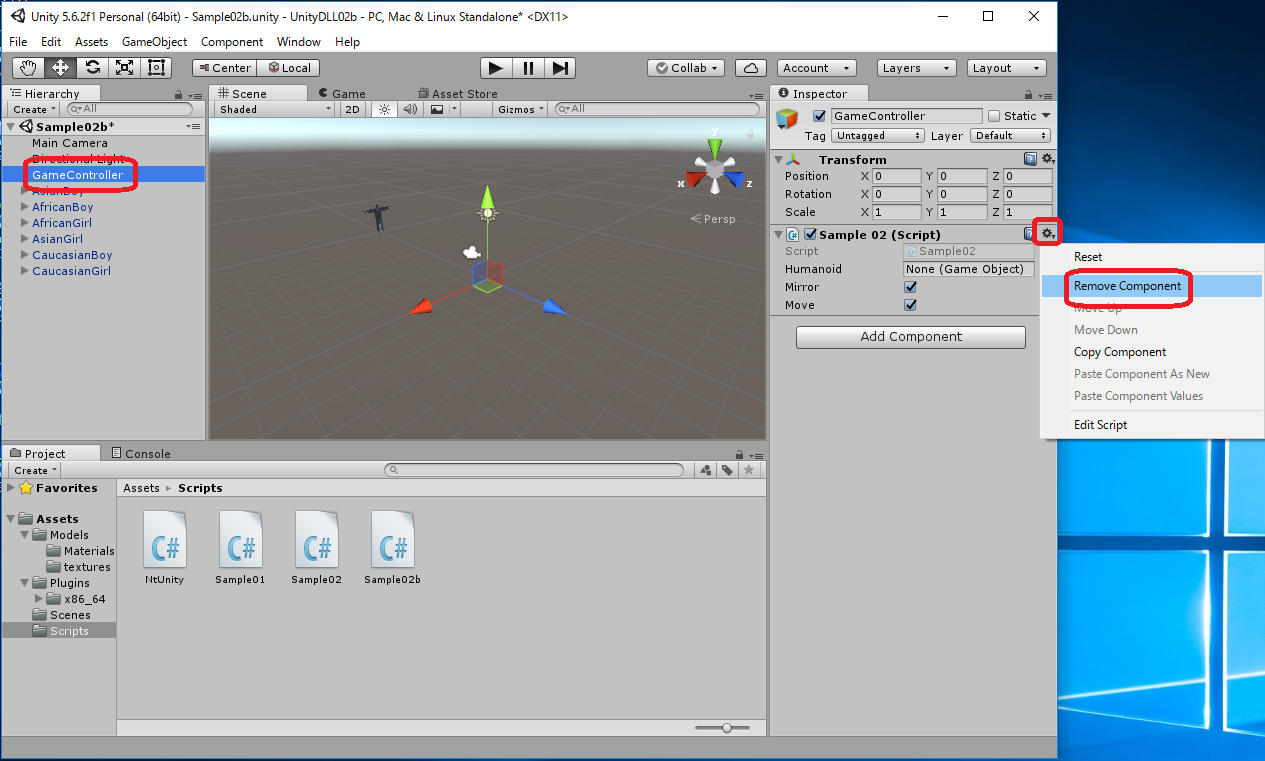
File -> Save Scence as -> "Sample02b.unity"
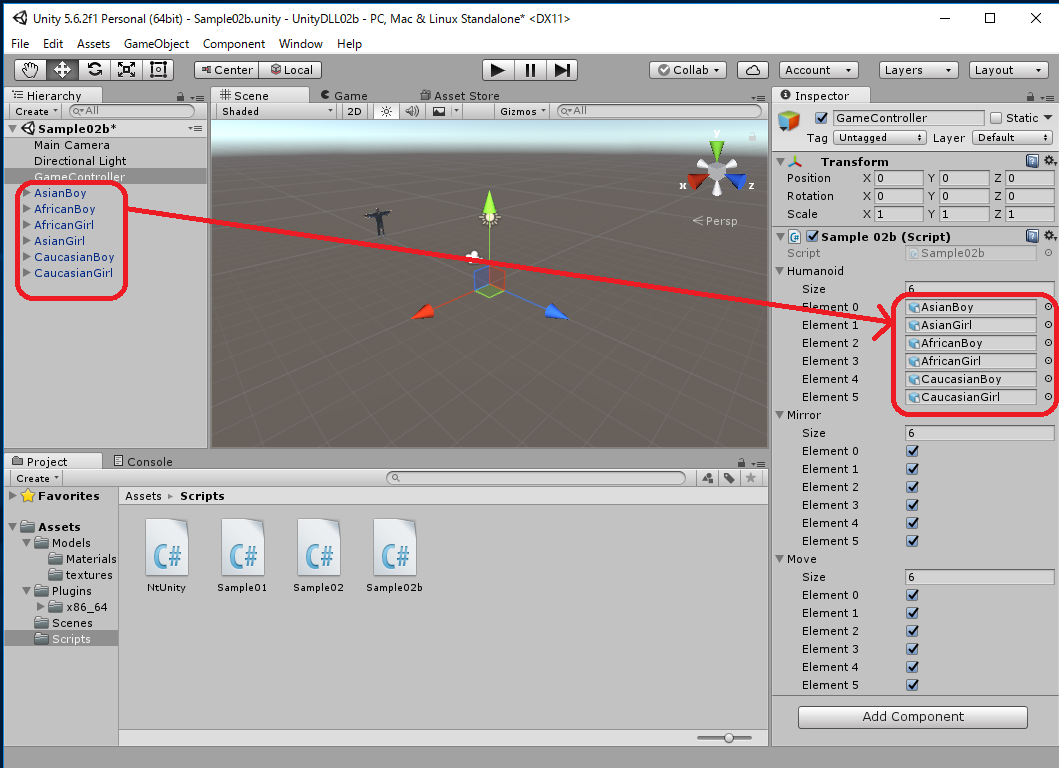
In the Hierarchy, there are 6 Humanoids now. Set each Position and Rotation as follows. With the Z coordinate of Position set to -10, when the skeleton is not recognized, it is not shown in the "Main Camera".
| Model Name | Position | Rotation | ||||
|---|---|---|---|---|---|---|
| X | Y | Z | X | Y | Z | |
| AsianBoy | 0 | 0 | -10 | 0 | 0 | 0 |
| AsianGirl | 0 | 0 | -10 | 0 | 0 | 0 |
| AfricanBoy | 0 | 0 | -10 | 0 | 0 | 0 |
| AfricanGirl | 0 | 0 | -10 | 0 | 0 | 0 |
| CaucasianBoy | 0 | 0 | -10 | 0 | 0 | 0 |
| CaucasianGirl | 0 | 0 | -10 | 0 | 0 | 0 |
| Sample02b.cs |
using System.Collections;
using System.Collections.Generic;
using UnityEngine;

public class Sample02b : MonoBehaviour {
  public GameObject[] humanoid = new GameObject[] {null, null, null, null, null, null};
  public bool[] mirror = new bool[] {true, true, true, true, true, true};
  public bool[] move = new bool[] {true, true, true, true, true, true};

  NtUnity.Kinect nt;
  NtUnity.HumanoidSkeleton[] hs = new NtUnity.HumanoidSkeleton[] {null, null, null, null, null, null};

  void Start () {
    nt = new NtUnity.Kinect();
    for (int i=0; i< humanoid.Length; i++) {
      if (humanoid[i] != null) {
	hs[i] = new NtUnity.HumanoidSkeleton(humanoid[i]);
      }
    }
  }

  void Update () {
    nt.setRGB();
    nt.setSkeleton();
    nt.setFace();
    nt.imshowBlack();
    for (int i=0; i<nt.skeleton.Count; i++) {
      if (hs[i] != null) {
	hs[i].set(nt,i,mirror[i],move[i]);
      } else {
	humanoid[i].transform.position = new Vector3(0,0,-10);
      }
    }
  }

  void OnApplicationQuit() {
    nt.stopKinect();
  }
}
|

File -> Save Scenes
Since the above zip file may not include the latest "NtKinectDLL.dl" and "NtUnity.cs", Download the latest version from here and replace old one with it.