Runtime Video Humanoid.mp4
Unity's coordinate system is left-handed. In the left-handed coordinate system, the positive rotate direction about each axis is "clockwise when looking at the origin from infinity of its axis".
 |
| Positive Rotate Direction Around Each Axis |
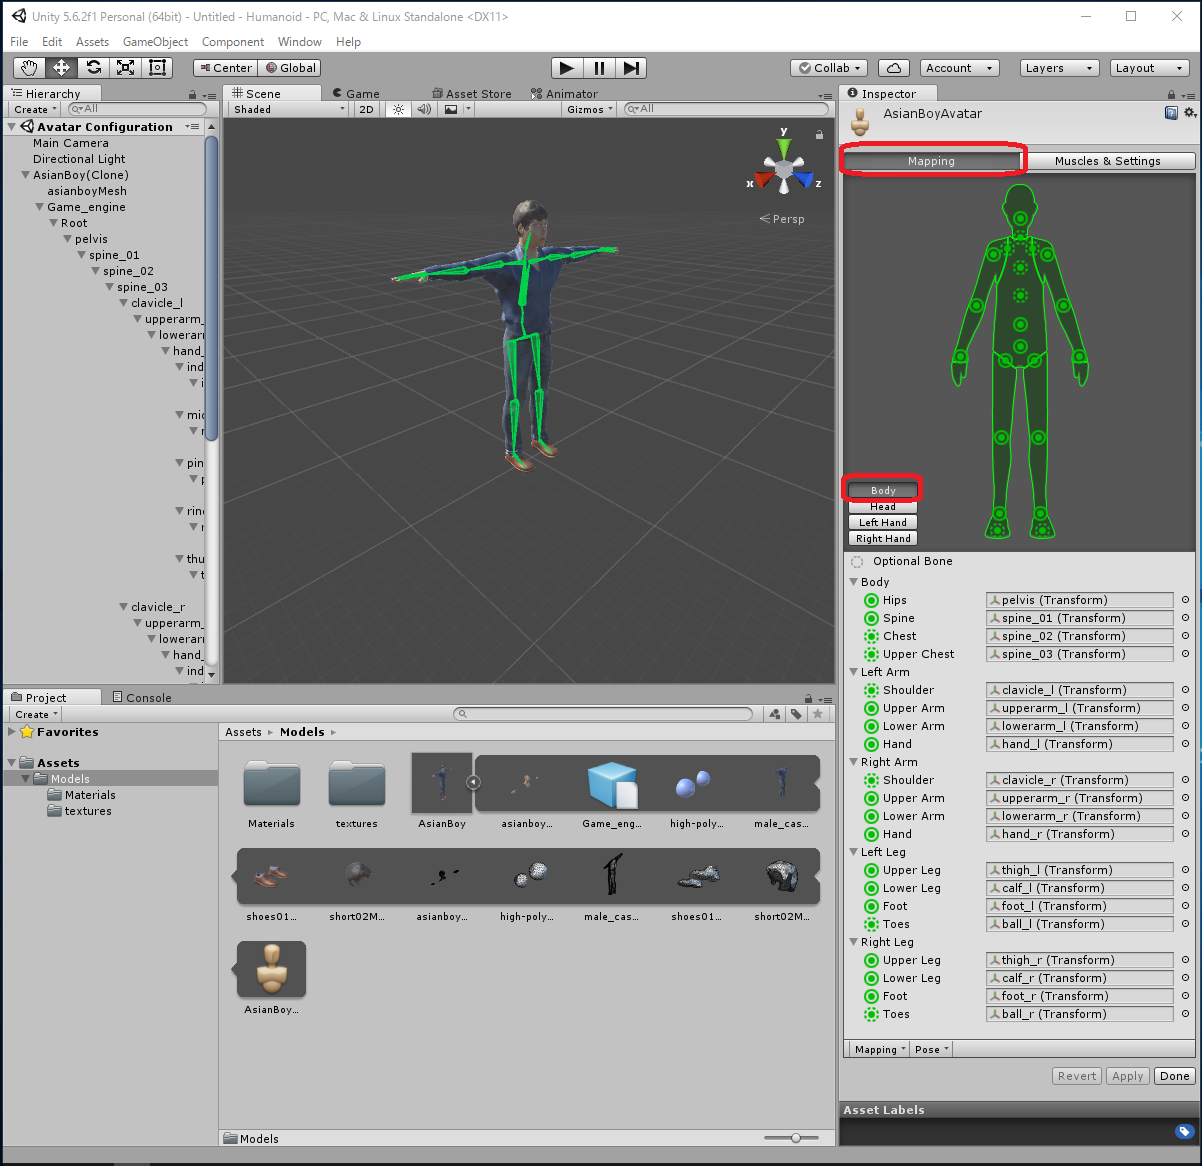
The skeleton of Unity's Humanoid is composed of layered bones. In "Mapping", solid outer circle and dotted outer circle indicates "Mandatory Bone" and "Optional Bone", respectively. The inner filled circle means Bone assigned in this Humanoid.

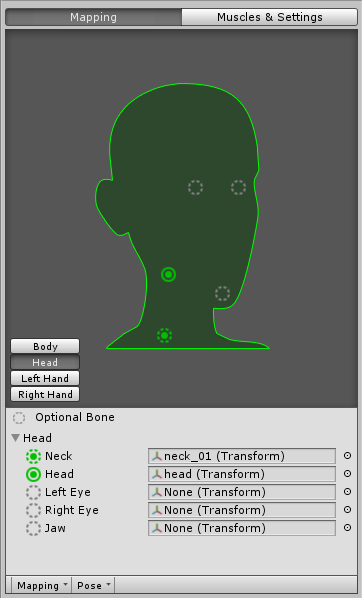
The type expressing Humanoid's Bone is Unity's HumanBodyBones , and the main ones are shown in the table below. In the table, the Bone which is the parent of each Bone's Transfrom was specified as "Parent Bone". In addition, we examined the orientation of the local coordinate axes in the Transform of each Bone, so the figure below shows it.
I will explain how to move Unity's Humanoid as you like by C# program.
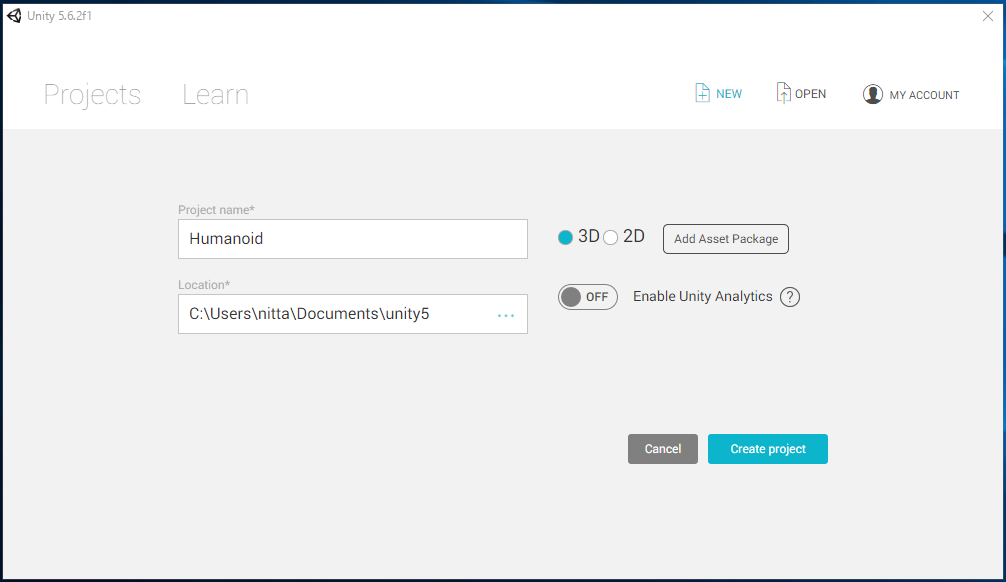
We create new "3D" project named "Humanoid".
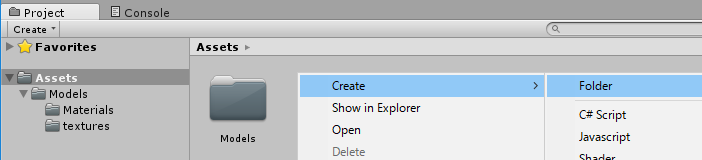
Assets -> Create -> Folder > Rename to "Models"
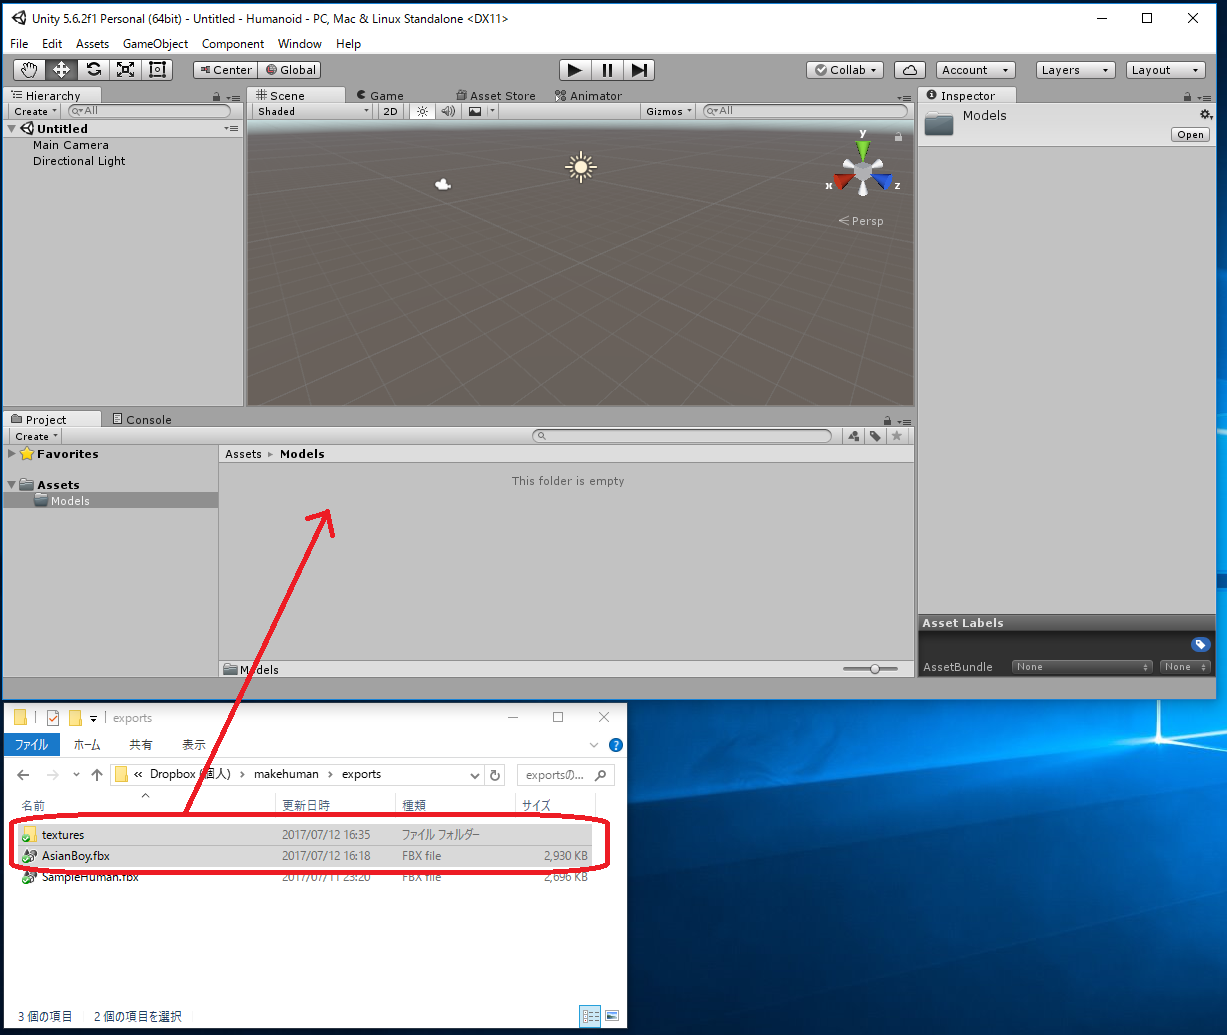
[Notice] The import operation above can be also done by
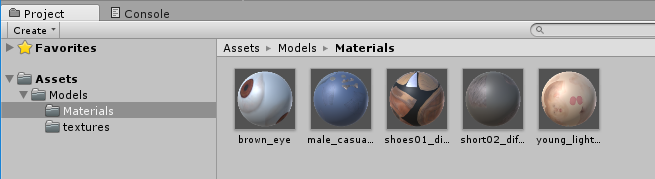
Assets -> Import New Asset... -> AsianBody.fbx. But in this way, the textures required for "AsianBoy.fbx" will not be imported automatically and the model may be completely white. In this case, you hove to import the textures corresponding to the white material generated in "Assets/Models/Materials/" manually.
 .
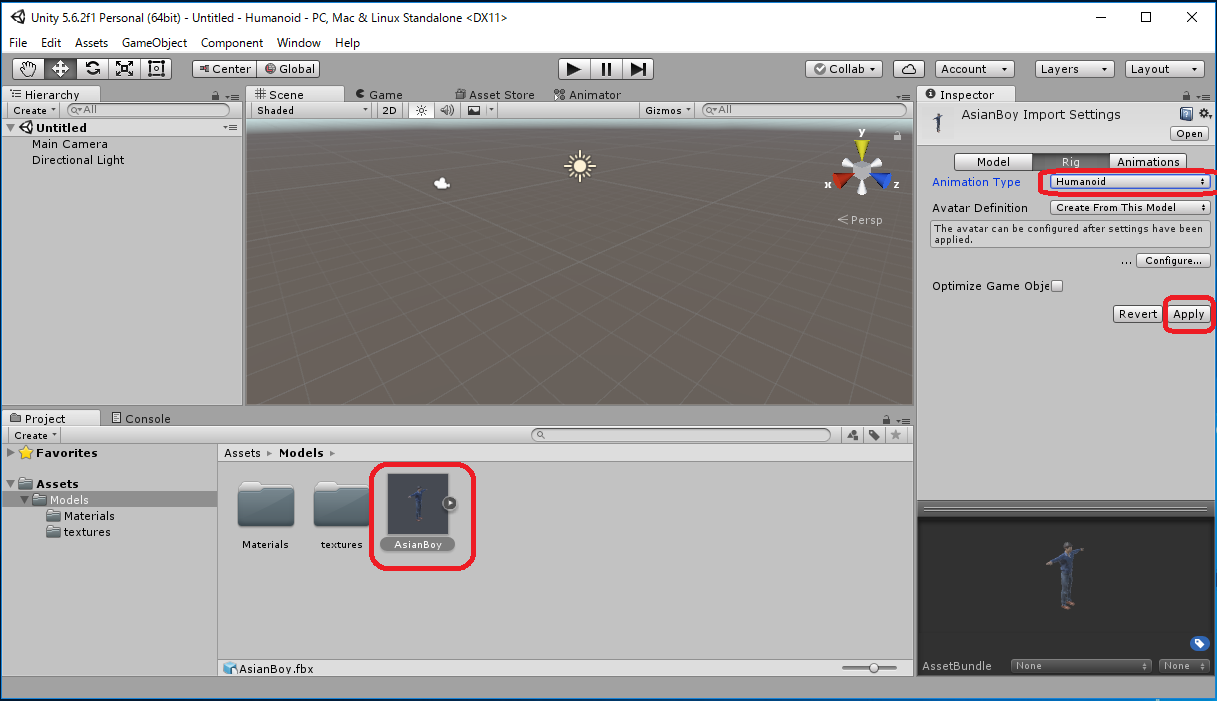
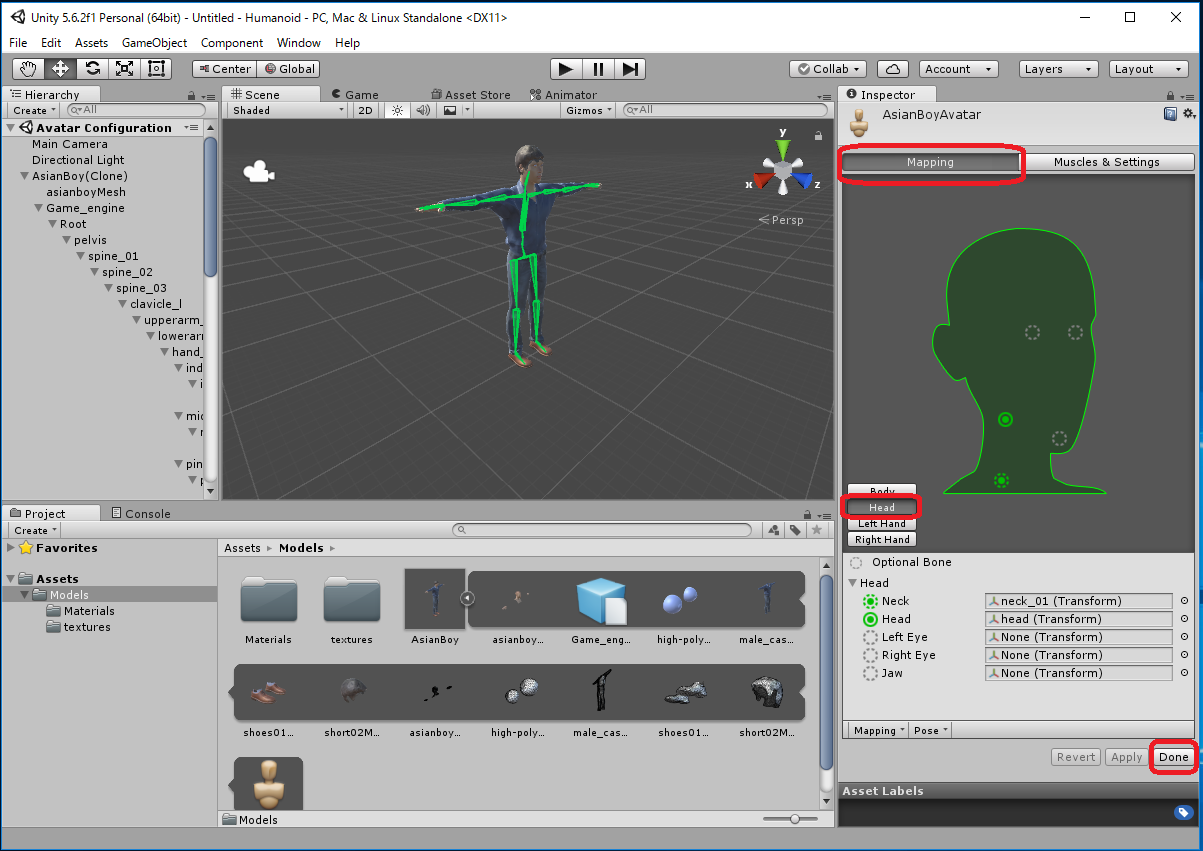
It is safer to click "Configure" in the Inspector window and make sure that the bone is set correctly.
.
It is safer to click "Configure" in the Inspector window and make sure that the bone is set correctly.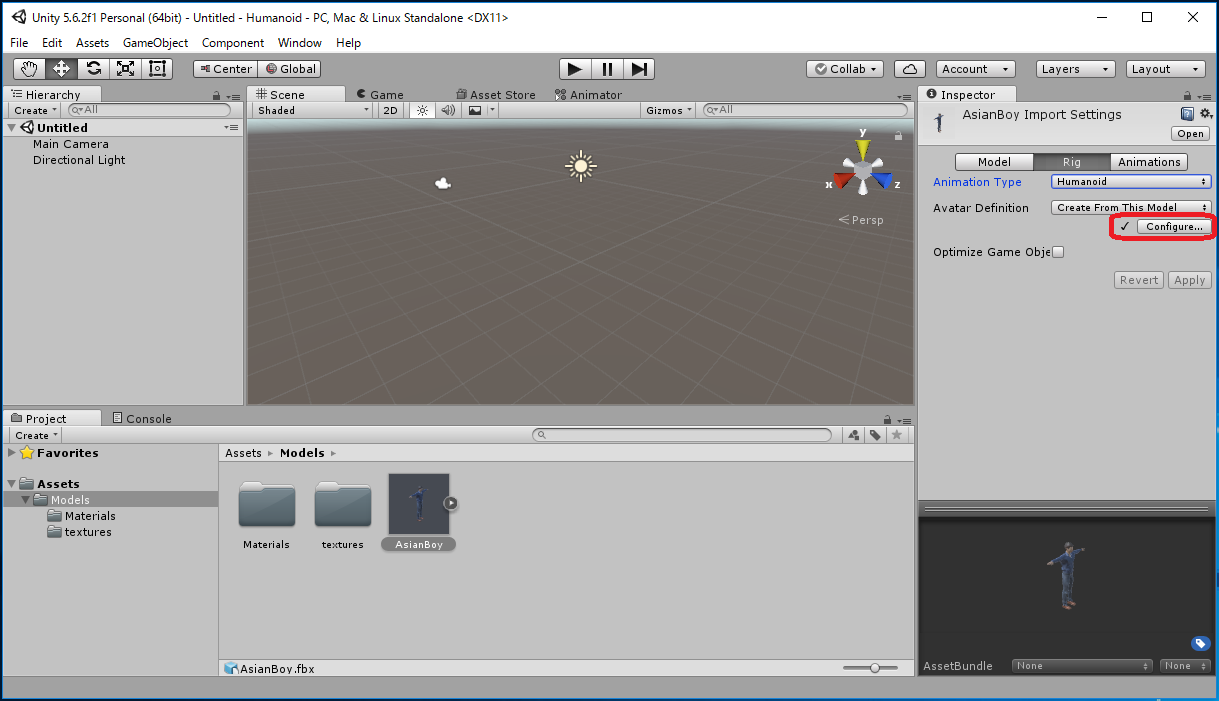

 in the Inspector window
to set Transform Position (x,y,z)=(0,0,0).
in the Inspector window
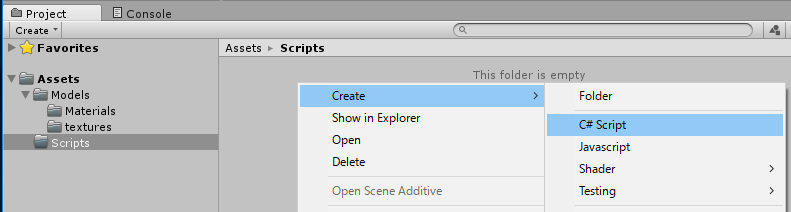
to set Transform Position (x,y,z)=(0,0,0).Right click in the project's Assets -> Create -> Folder -> Rename it as "Scripts"
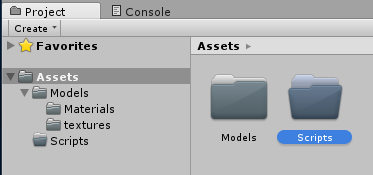
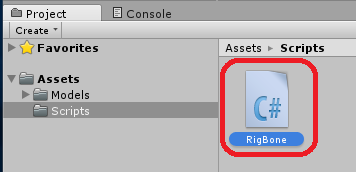
Right click in the project's "Assets/Scripts" -> Create -> C# Script -> Rename it as "RigBone".Notice that "RigBone" class does not extend "MonoBehavior" class.
Imported Humanoid data has an Animator component attached. In the Animator component, Bones are layered so as to be suitable for the human skeleton, and the Transform can be obtained with the GetBoneTransform(HumanBodyBones) function.
The "RigBone" class provides a method for changing the localRotation of Transform with the specified quaternion q. Instead of giving a direct quaternion, we prepared same name function which are given rotation angle and rotation axis.
| RigBone.cs |
using System.Collections;
using System.Collections.Generic;
using UnityEngine;

public class RigBone {
  public GameObject gameObject;
  public HumanBodyBones bone;
  public bool isValid;
  Animator animator;
  Quaternion savedValue;
  public RigBone(GameObject g, HumanBodyBones b) {
    gameObject = g;
    bone = b;
    isValid = false;
    animator = gameObject.GetComponent<Animator>();
    if (animator == null) {
      Debug.Log("no Animator Component");
      return;
    }
    Avatar avatar = animator.avatar;
    if (avatar == null || !avatar.isHuman || !avatar.isValid) {
      Debug.Log("Avatar is not Humanoid or it is not valid");
      return;
    }
    isValid = true;
    savedValue = animator.GetBoneTransform(bone).localRotation;
  }
  public void set(float a, float x, float y, float z) {
    set(Quaternion.AngleAxis(a, new Vector3(x,y,z)));
  }
  public void set(Quaternion q) {
    animator.GetBoneTransform(bone).localRotation = q;
    savedValue = q;
  }
  public void mul(float a, float x, float y, float z) {
    mul(Quaternion.AngleAxis(a, new Vector3(x,y,z)));
  }
  public void mul(Quaternion q) {
    Transform tr = animator.GetBoneTransform(bone);
    tr.localRotation = q * tr.localRotation;
  }
  public void offset(float a, float x, float y, float z) {
    offset(Quaternion.AngleAxis(a, new Vector3(x,y,z)));
  }
  public void offset(Quaternion q) {
    animator.GetBoneTransform(bone).localRotation = q * savedValue;
  }
  public void changeBone(HumanBodyBones b) {
    bone = b;
    savedValue = animator.GetBoneTransform(bone).localRotation;
  }
}
|
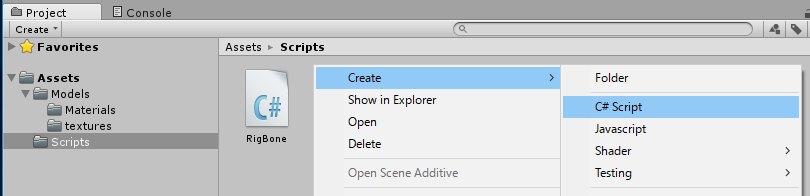
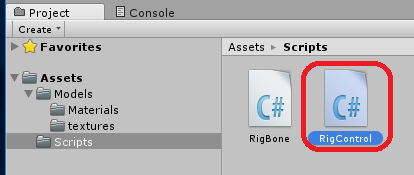
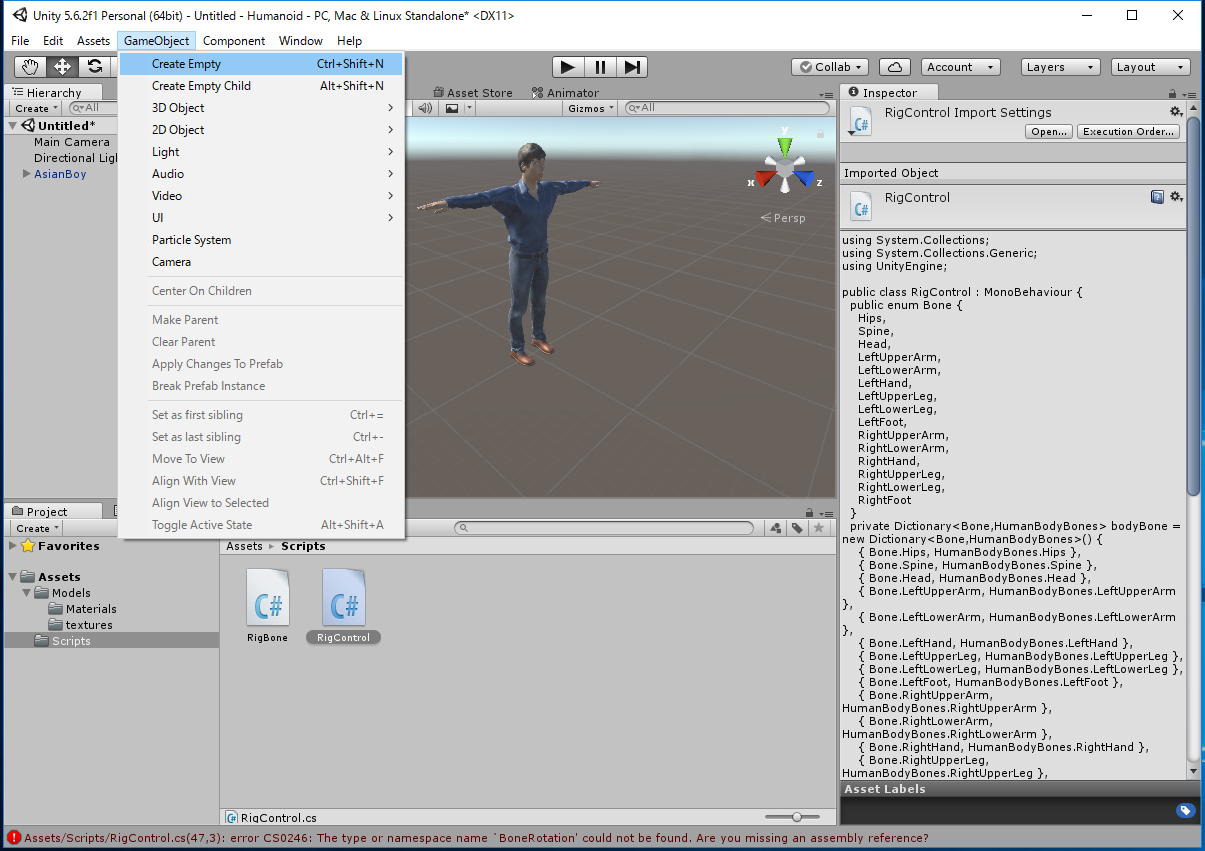
Right click in the Assets/Scripts -> Create -> C# Script -> rename it as "RigControl"
Humanoid operates at 2-second cycles. It Shakes the left upper arm and the left lower arm in the horizontal direction and the right upper arm in the vertical direction. It repeated bending and streching the right sigh and right knee by 90 degrees.
Each bone is set the next range of rotation in its local coordinate system.
| Bone | Axis | Min | Max |
|---|---|---|---|
| LeftUpperArm | X-axis | -80 | 80 |
| LeftLowerArm | X-axis | 0 | 90 |
| RigtUpperArm | Z-axis | -90 | 90 |
| RigthUpperLeg | X-axis | 90 | 180 |
| RightLowerLeg | X-axis | 0 | 90 |
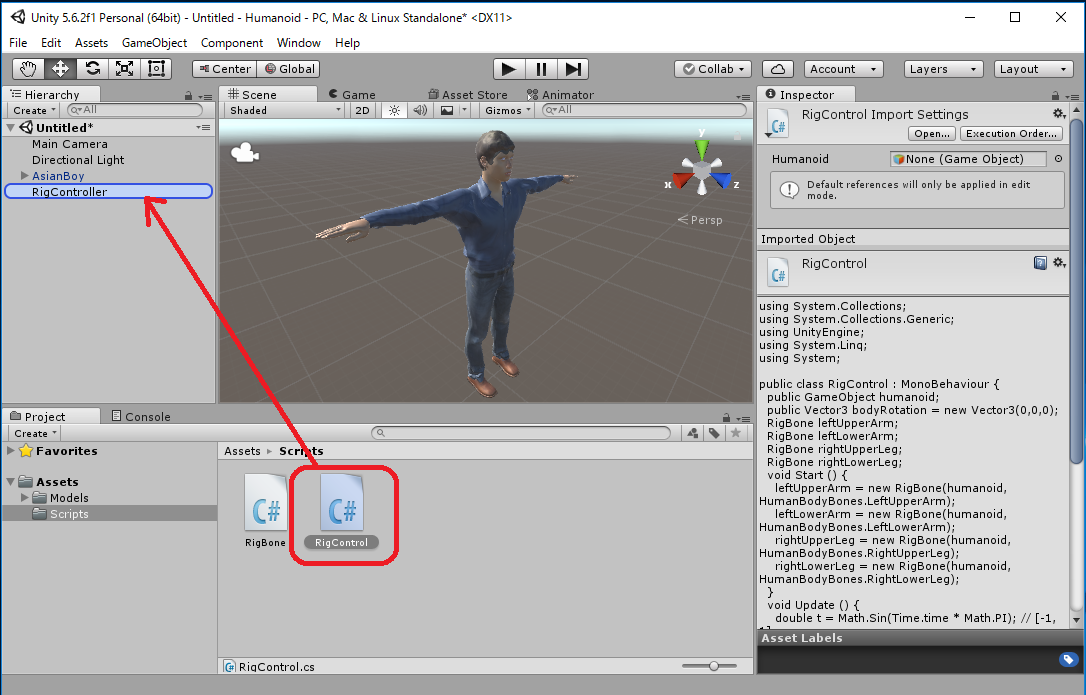
In the following program, joints are bent using the RigBone.set(Quaternion) function. To rotate the entire Humanoid, set humanoid.transform.rotation to the value in the world coordinate system. The order of Rotation in Transform in Unity Editor is Y, X, Z in order, so apply here in that order as well.
| RigControl.cs |
using System.Collections;
using System.Collections.Generic;
using UnityEngine;
using System.Linq;
using System;

public class RigControl : MonoBehaviour {
  public GameObject humanoid;
  public Vector3 bodyRotation = new Vector3(0,0,0);
  RigBone leftUpperArm;
  RigBone leftLowerArm;
  RigBone rightUpperArm;
  RigBone rightUpperLeg;
  RigBone rightLowerLeg;
  void Start () {
    leftUpperArm = new RigBone(humanoid, HumanBodyBones.LeftUpperArm);
    leftLowerArm = new RigBone(humanoid, HumanBodyBones.LeftLowerArm);
    rightUpperArm = new RigBone(humanoid, HumanBodyBones.RightUpperArm);
    rightUpperLeg = new RigBone(humanoid, HumanBodyBones.RightUpperLeg);
    rightLowerLeg = new RigBone(humanoid, HumanBodyBones.RightLowerLeg);
  }
  void Update () {
    double t = Math.Sin(Time.time * Math.PI); // [-1, 1]
    double s = (t+1)/2;                       // [0, 1]
    double u = 1-s/2;                         // [0.5, 1]
    leftUpperArm.set((float)(80*t),1,0,0);
    leftLowerArm.set((float)(90*s),1,0,0);
    rightUpperArm.set((float)(90*t),0,0,1);
    rightUpperLeg.set((float)(180*u),1,0,0);
    rightLowerLeg.set((float)(90*s),1,0,0);
    humanoid.transform.rotation
      = Quaternion.AngleAxis(bodyRotation.z,new Vector3(0,0,1))
      * Quaternion.AngleAxis(bodyRotation.x,new Vector3(1,0,0))
      * Quaternion.AngleAxis(bodyRotation.y,new Vector3(0,1,0));
  }
}
|
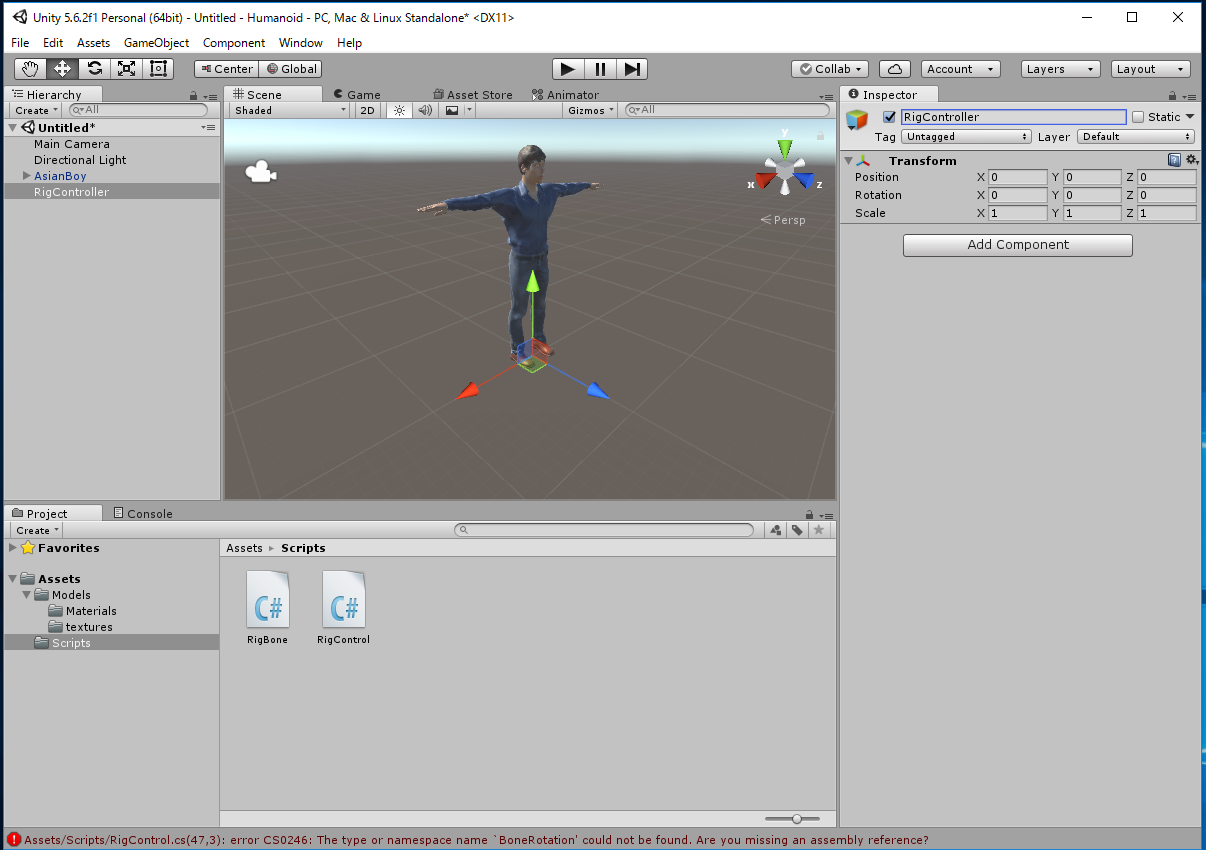
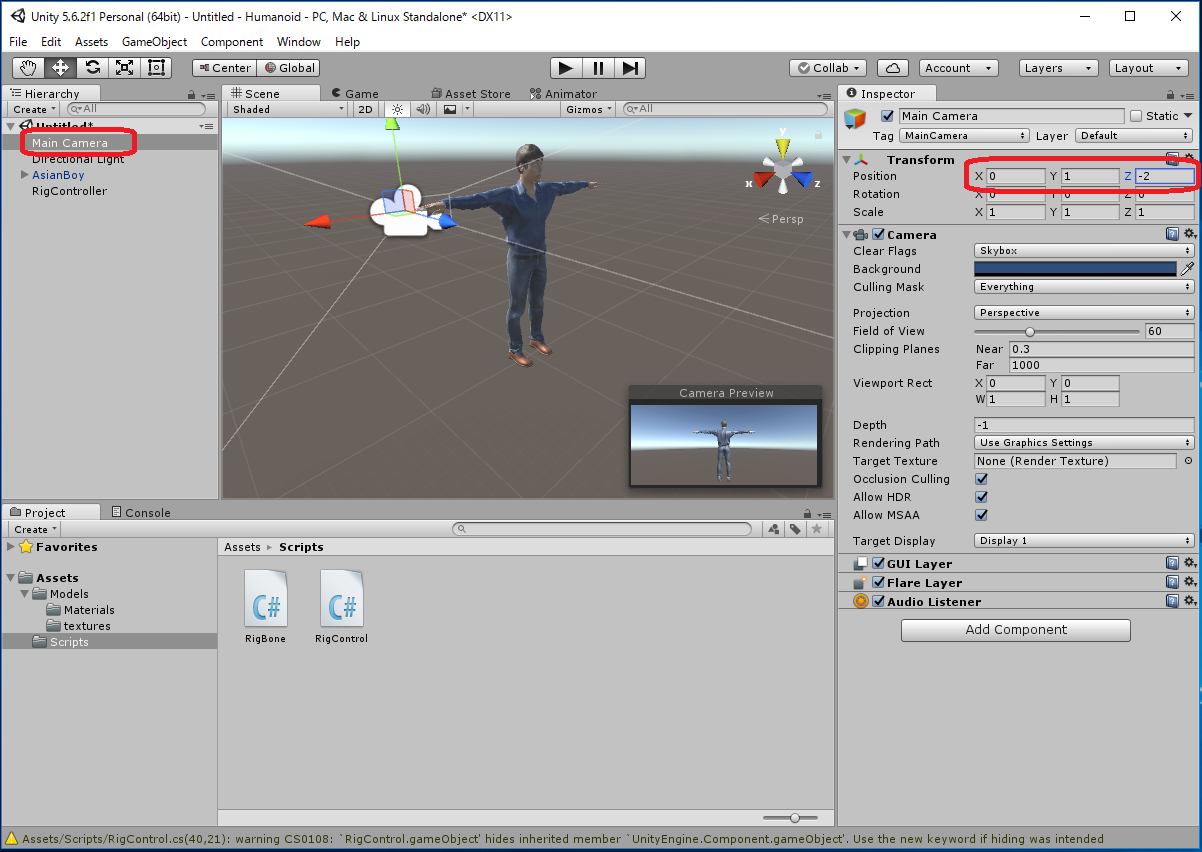
in the Inspector window
to set Transform Position (x,y,z)=(0,0,0).
Because the Main Camera is a little too far away, lets set its Transform Position (x,y,z) = (0,1,-2).
File -> Save Scene As ...
 to execute this program.
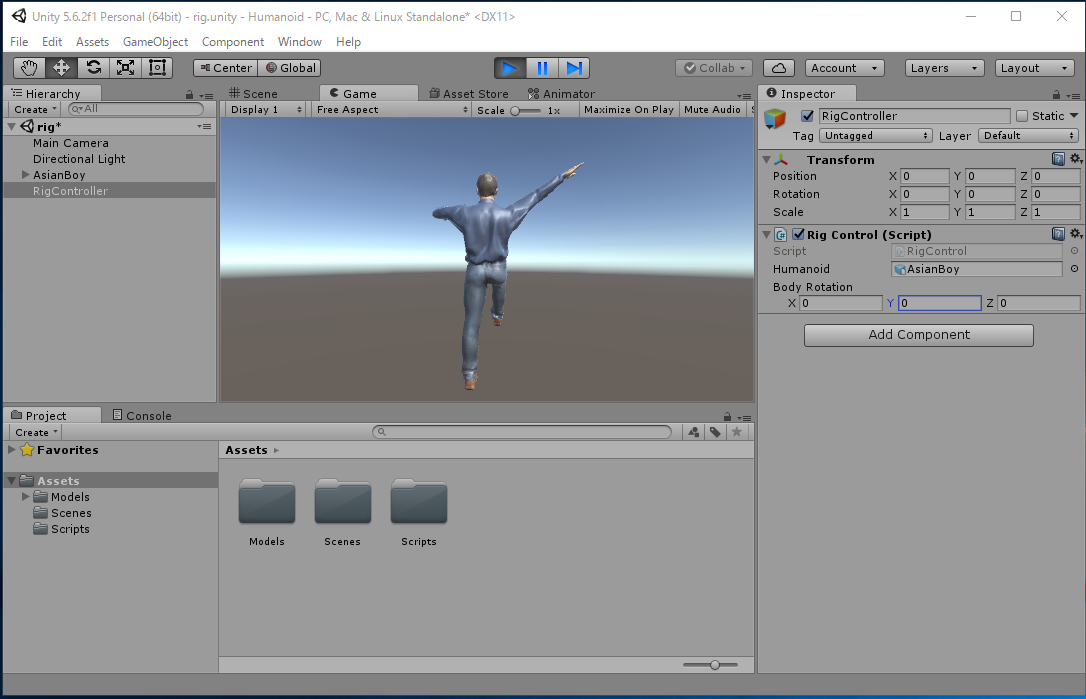
When executing the program, some bones moves in 2 second cycle.
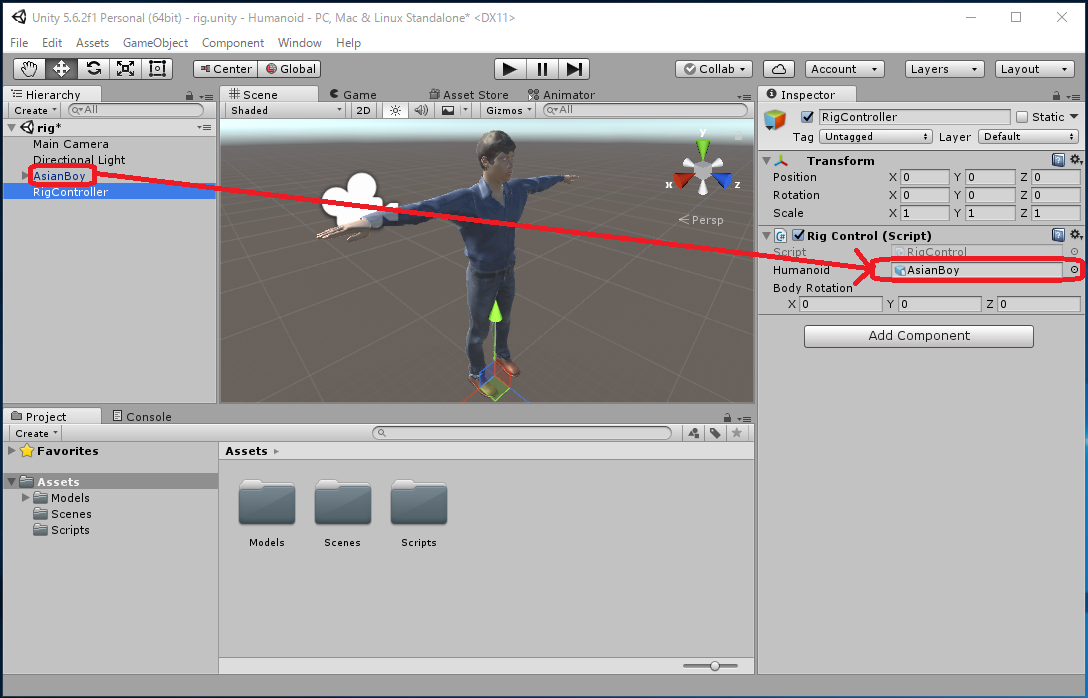
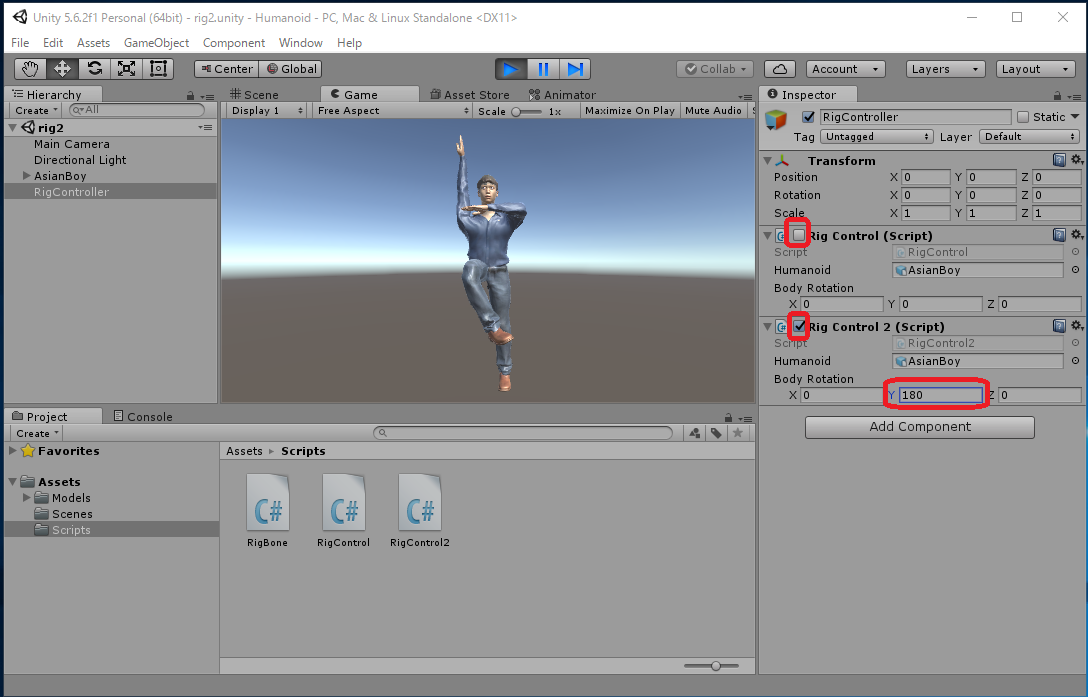
While executing the program, select "RigController" in the Hierarchy window and set the "BodyRotation" of the "Rig Control 2 (Script)" component in the RigController Inspector window to (X,Y,Z)=(0,180,0), Humanoid will turn to the camera.

Runtime Video HumanoidRig.mp4
File -> Save Scene as .. -> rig2.scene
In "RigControl2.cs", we changed to use the RigBone class's offset(Quaternion) method, that is, it adds rotation to the initial value of localRotation of each bone.
In "RigControl.cs" of the previous example, we use the set() function of the RigBone class. That is, since we moved the bone without using the initial value of localRotation of each bone, we needed to set a special value for rotation angle for each bone. For example, when RightUpperLeg is set to 0 degree, the foot points directly upward, so we set a valuebetween 90 degree and 180 degree.
In "RigControl2.cs", since we add rotation to the initial value by using the offset() function of the RigBone class, if we give values around 0 degree to any bone, it works correctly. Of course, it is necessary to judge which one of the positive direction and the negative direction is a natural movement for the joint of each bone, but I think this is much easier way to think.
Each bone is added the next range of rotation to the intial localRotation.
| Bone | Axis | Min | Value |
|---|---|---|---|
| LeftUpperArm | X | -80 | 80 |
| LeftLowerArm | X | 0 | 90 |
| RigtUpperArm | Z | -90 | 90 |
| RigthUpperLeg | X | -90 | 0 |
| RightLowerLeg | X | 0 | 90 |
| RigControl2.cs |
using System.Collections;
using System.Collections.Generic;
using UnityEngine;
using System.Linq;
using System;

public class RigControl2 : MonoBehaviour {
  public GameObject humanoid;
  public Vector3 bodyRotation = new Vector3(0,0,0);
  RigBone leftUpperArm;
  RigBone leftLowerArm;
  RigBone rightUpperArm;
  RigBone rightUpperLeg;
  RigBone rightLowerLeg;
  void Start () {
    leftUpperArm = new RigBone(humanoid, HumanBodyBones.LeftUpperArm);
    leftLowerArm = new RigBone(humanoid, HumanBodyBones.LeftLowerArm);
    rightUpperArm = new RigBone(humanoid, HumanBodyBones.RightUpperArm);
    rightUpperLeg = new RigBone(humanoid, HumanBodyBones.RightUpperLeg);
    rightLowerLeg = new RigBone(humanoid, HumanBodyBones.RightLowerLeg);
  }
  void Update () {
    double t = Math.Sin(Time.time * Math.PI); // [-1, 1]
    double s = (t+1)/2;                       // [0, 1]
    leftUpperArm.offset((float)(80*t),1,0,0);
    leftLowerArm.offset((float)(90*s),1,0,0);
    rightUpperArm.offset((float)(90*t),0,0,1);
    rightUpperLeg.offset((float)(-90*s),1,0,0);
    rightLowerLeg.offset((float)(90*s),1,0,0);
    humanoid.transform.rotation
      = Quaternion.AngleAxis(bodyRotation.z,new Vector3(0,0,1))
      * Quaternion.AngleAxis(bodyRotation.x,new Vector3(1,0,0))
      * Quaternion.AngleAxis(bodyRotation.y,new Vector3(0,1,0));
  }
}
|
Since we added a rotation to the initial value of the localRotation of each Bone, it seems to be slightly distorted rotation. However, it seems that there is much better way to move Humanoid's bone by program.
Runtime Video HumanoidRig2.mp4
The Unity's project is here (Humanoid.zip)。
